

Overview
The Secrets Management page is the customer-facing encrypted store for credentials and sensitive tokens used by Genesis integrations and workflows.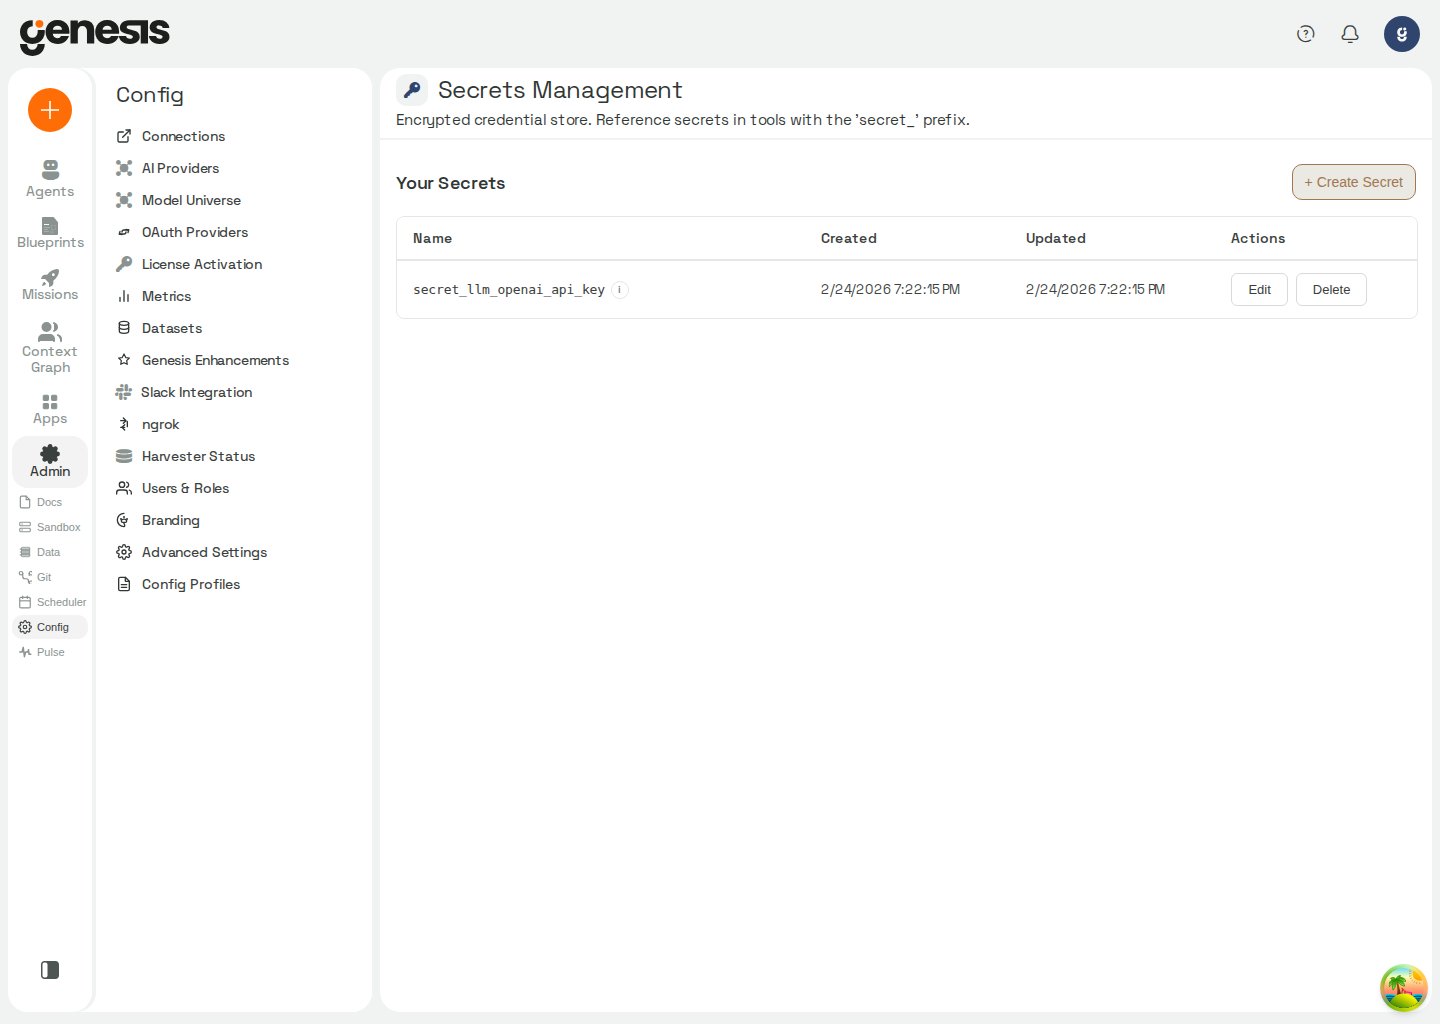
What the page supports
- viewing the current secret inventory,
- creating a new secret,
- editing or rotating an existing secret,
- deleting a secret,
- understanding whether encryption setup is complete.
Encryption setup and status
On Snowflake Native App (SPCS) deployments, Config → Secrets shows an Encryption Key Configuration card. Genesis reports one of three states: The card and its status check are shown only to admins or users withmanage_secrets. view_secrets alone can grant access to the Secrets page but
does not grant access to encryption status.
To configure a missing key in a Snowflake Native App deployment, open Config → Secrets and follow the encryption setup instructions. Run the displayed SQL in a Snowflake worksheet using a role that can create a database, secret, network rule, and external access integration (ACCOUNTADMIN by default). The SQL generates the key inside Snowflake and stores it directly in
GENESIS_SECRETS.PUBLIC.GENESIS_ENCRYPTION_KEY; it never displays or sends the key to Genesis. Step 2 runs a Python procedure, so use a warehouse (run USE WAREHOUSE <your_warehouse>; first if your role has no default warehouse). The SQL uses plain CREATE statements: on a rerun, skip objects that already exist. In particular, replacing the key secret would make credentials encrypted with the existing key unreadable. After creating the objects, bind the secret and external access integration to the app in Snowsight, then enable encryption in Genesis.
Backing up the key (Snowflake Native App deployments only). The key cannot
be recovered if it is lost, so keep a copy. When the key is your own Snowflake
secret, an admin opens Genesis → Config → Secrets → Back up key on the
Encryption Key Configuration card. Genesis never shows or returns the key:
the dialog shows SQL, pre-filled with the secret and integration bound to the
app, that you run in a Snowsight worksheet as a role with READ on the secret
and USAGE on the integration (typically the admin who set up encryption). The
result is your key; save it in your password manager and don’t paste it
anywhere. Snowflake keeps query results for 24 hours, and Snowsight caches a
worksheet’s latest results for up to 90 days, so use a worksheet you don’t share
and delete it afterwards. Snowflake itself refuses the SQL to a role without
those privileges.
On other deployments the key is supplied by your platform configuration
(environment variable or secret manager), so Genesis offers no backup action:
back the key up where it is stored.
Other deployments surface encryption guidance only when relevant. Customers
should follow the in-product instructions before storing production secrets.
The master encryption key that protects stored secrets is resolved at startup.
Production Kubernetes installs must supply it via secrets.genesisMasterKey,
secrets.existingSecretGenesisMasterKey, or
config.extraEnv.GENESIS_MASTER_KEY_REF (an aws_* / gcp_* reference
resolved via IRSA/ADC). See External Secrets — Master encryption key
for resolution priority and Helm examples.
If a state snapshot requires a key from an in-progress rotation, configure
that key as the active or previous master key before restoring it. See State
Snapshots and Migration
for the restore requirements.
Embedded Tailscale (Snowflake Native App)
On Snowflake Native App (SPCS) deployments, Config → Secrets has a Tailscale tab (/config/secrets?tab=tailscale) next to the default
Secrets tab. It holds the Embedded Tailscale card, the egress
allow-list and the ACL tags. This is optional —
enable it only when Genesis must reach a private LLM gateway on your tailnet
(for example Tailscale Aperture). Genesis never generates or receives your
Tailscale auth key through the API; you paste your own tskey-auth-... value
into operator-run SQL.
When you click Set up embedded Tailscale, Genesis walks you through:
- Run the generated
CREATE SECRETSQL asACCOUNTADMIN(createsGENESIS_TSNET.SECRETS.TSNET_AUTH_KEY). - In Snowsight → your Genesis app → Configurations, bind Tailscale Auth
Key Secret to that secret and connect Tailscale Control Plane External
Access.
Binding this reference is independent of other external access integrations
(such as
genesis_external_accessfor general outbound access). Assigning or approving one reference does not replace bindings for the others. - Click Enable Tailscale in Genesis (calls
CORE.ENABLE_TSNET_ACCESS()). - Suspend then resume the Genesis service so the container reads the key at boot.
GET /api/health
— a tsnet object with "online": true when embedded Tailscale is running,
and "status": "healthy" when there is no impairment.
Troubleshooting degraded embedded Tailscale
On SPCS, Genesis boots degraded-ready (reachable UI, no tailnet egress) instead of crash-looping when embedded Tailscale was previously configured but cannot connect at container start.GET /api/health and
GET /api/health/startup then return "status": "degraded" (or
"status": "ready" with "degraded": true on the startup route) plus a
degraded_reason that names the fault. HTTP stays 200 so Snowflake keeps
routing to the service while you recover.
At boot, container/launch.sh reads CORE.GET_TSNET_BOOT_CONFIG() (auth key,
advertise tags, and whether tsnet was previously enabled). If tsnet was expected
but the auth key is empty, the boot helper calls CORE.ENABLE_TSNET_ACCESS()
once to self-heal when the Native App references are still associated (for
example after an upgrade reverted the auth-key UDF). When references are
unassociated, self-heal cannot recover the key — follow the recovery path below.
Tailscale egress allow-list
On the Tailscale tab, below the status card, expand Tailscale egress allow-list to edit thehost:port destinations the embedded-Tailscale External Access Integration may
reach (stored in APP1.TSNET_EGRESS and emitted by
CORE.GET_CONFIG_FOR_TAILSCALE_EAI).
- Broad default
0.0.0.0:443(recommended) — permits outbound HTTPS to any host and never goes stale when Tailscale rotates DERP servers. - Enumerated control-plane and DERP hosts (tighter Snowflake-layer egress) —
run the DERP-map refresh script from the in-repo Tailscale setup guide, paste
the output into Paste a host:port list, click Apply pasted list, then
Save. An enumerated list must include Tailscale’s four control-plane hosts
(
controlplane.tailscale.com:443,login.tailscale.com:443,log.tailscale.com:443,console.tailscale.com:443) plus at least one reachable DERP relay (derp*.tailscale.com:443).
Tailscale ACL tags
On the Tailscale tab, below the egress section, expand Tailscale ACL tags to edit the ACL tag(s) the embedded-Tailscale device asserts attailscale up (stored in
APP1.TSNET_ADVERTISE_TAGS and read at container boot together with the auth
key in one Snowflake call via CORE.GET_TSNET_BOOT_CONFIG()).
- Required for the OAuth-client auth path — when the auth key is an OAuth
client secret or OAuth-client auth key (instead of a standard pre-tagged
reusable key), Tailscale requires
--advertise-tagsat connect time. - Enter one or more tags as a comma-separated list (for example
tag:genesis-spcsortag:genesis-spcs,tag:prod). Leave empty to omit--advertise-tags(pre-tagged auth keys keep working unchanged). - Each tag must look like
tag:<name>where<name>is letters, digits, or hyphens (starting alphanumeric). - The tag must be authorized for your auth key in the tailnet ACL (
tagOwners); otherwisetailscale upis rejected at boot.
Disable embedded Tailscale
When Tailscale is configured, click Disable embedded Tailscale on the card. Genesis callsCORE.DISABLE_TSNET_ACCESS() (reverts the auth-key UDF, removes
Tailscale external access from the running service, and unbinds the Native App
references). Your saved egress allow-list is kept for a later re-enable.
The modal then shows operator-run teardown SQL for consumer-owned objects the
app cannot drop (the TSNET_AUTH_KEY secret and orphan reference EAIs/network
rules). Run that SQL as ACCOUNTADMIN, then suspend/resume the service so
the container drops the tunnel (auth is read at boot).
For deployment-level context (including GENESIS_TSNET_ADVERTISE_TAGS), see
Installation & Configuration.
Ownership and access
Connection credentials saved through Config → Connections are stored as Genesis Secrets. For personal connections, secret ownership matches the connection owner — including after cross-instance bundle import or when an administrator reassigns ownership. Genesis reassigns secret ownership when deferred ownership resolves on the owner’s first login, without changing secret values. For shared connections, secrets stay with the user who saved the connection; other users access them through Roles with Access and RBAC role grants on the connection, not individual secret ownership. Depending on your deployment, standalone secrets created in Config → Secrets may also be personal or shared, and some workspaces support role-based access assignment so the right users or agents can use them. The same ownership and RBAC checks apply when Genesis reads managed secrets from the server, CLI, or worker process; no separate per-process grant is required. For LLM provider runtime propagation after a secret mutation, see LLM provider save validation and rollback.Platform-managed secrets
Genesis also uses the encrypted secret backend for certain internal values. For example, the HMAC signing key used for GenesisAppGENESIS_APP_TOKEN /
X-Genesis-App-Token credentials is stored in the Genesis secret store instead
of a local file. No manual setup is required for this key, but it now follows
the same encrypted-storage model as other Genesis-managed secrets.
Existing deployments migrate the legacy file-based key into the secret store
automatically during startup.
On main-server startup, Genesis may also create managed secrets for unset secret
config fields whose schema declares default_env_var and whose env var is set
(for example OPENAI_API_KEY seeded from Helm extraEnv). Each capture stores
the value at the field’s default secret_<path> name with a description noting
the config field. These secrets appear in your inventory like any other
platform-managed secret and can be rotated through this page. Capture never
overwrites an existing secret; if capture is skipped (for example the encryption
key is not yet available), Genesis retries on the next startup.
Report signing uses a platform-managed shared secret for the install’s Ed25519
private key. An authorized operator can set it up through the
POST /api/estate/attestation/signing-key API;
the private key stays on the server and is never returned. Setup is create-only:
it will not replace a key or an operator-configured signing reference. The public
verification key and setup availability are available from the
GET /api/estate/attestation/public-key API.