

When you connect a repository, it is cloned into a dedicated space using your project ID as the repository identifier (
repo_id). This makes code accessible to AI data agents working on your mission.Easy repository connection
1
Streamlit
Go to the Streamlit GUI to set configurations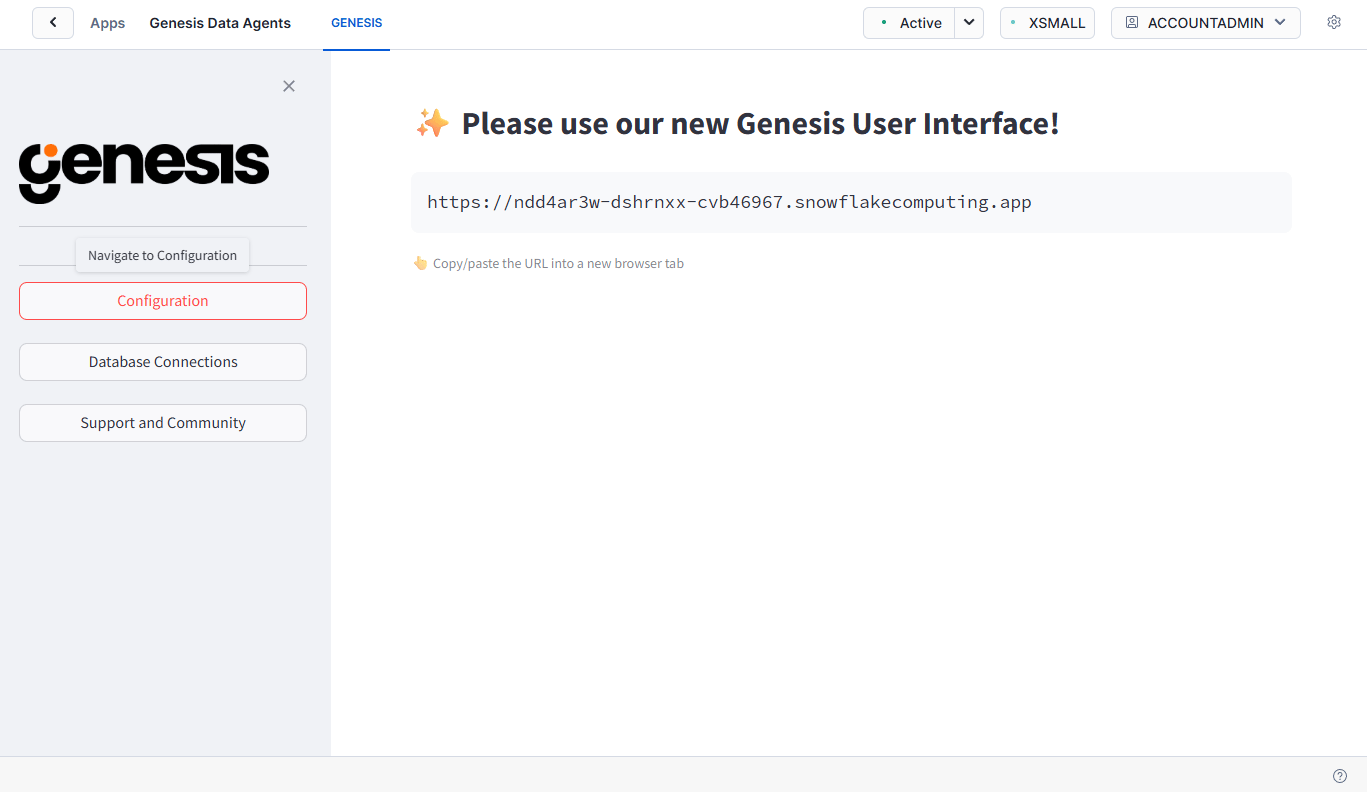
2
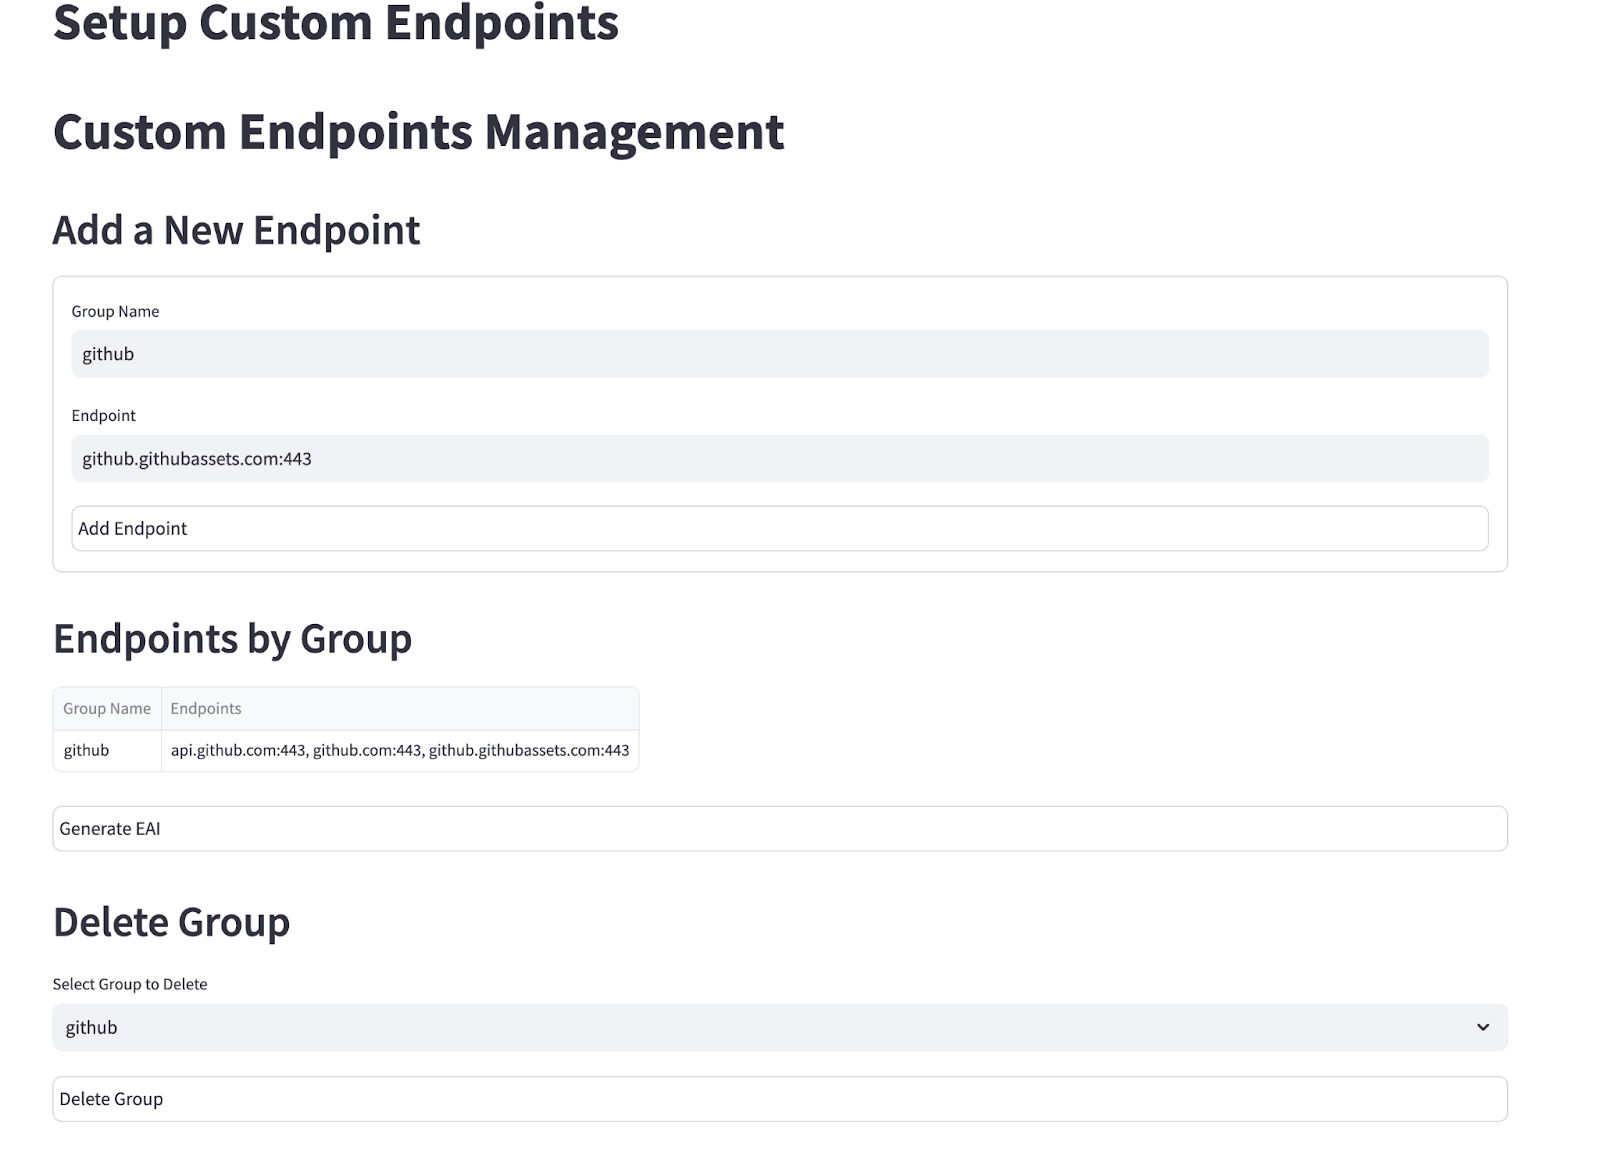
Custom Endpoints Screen
Scroll down until you see 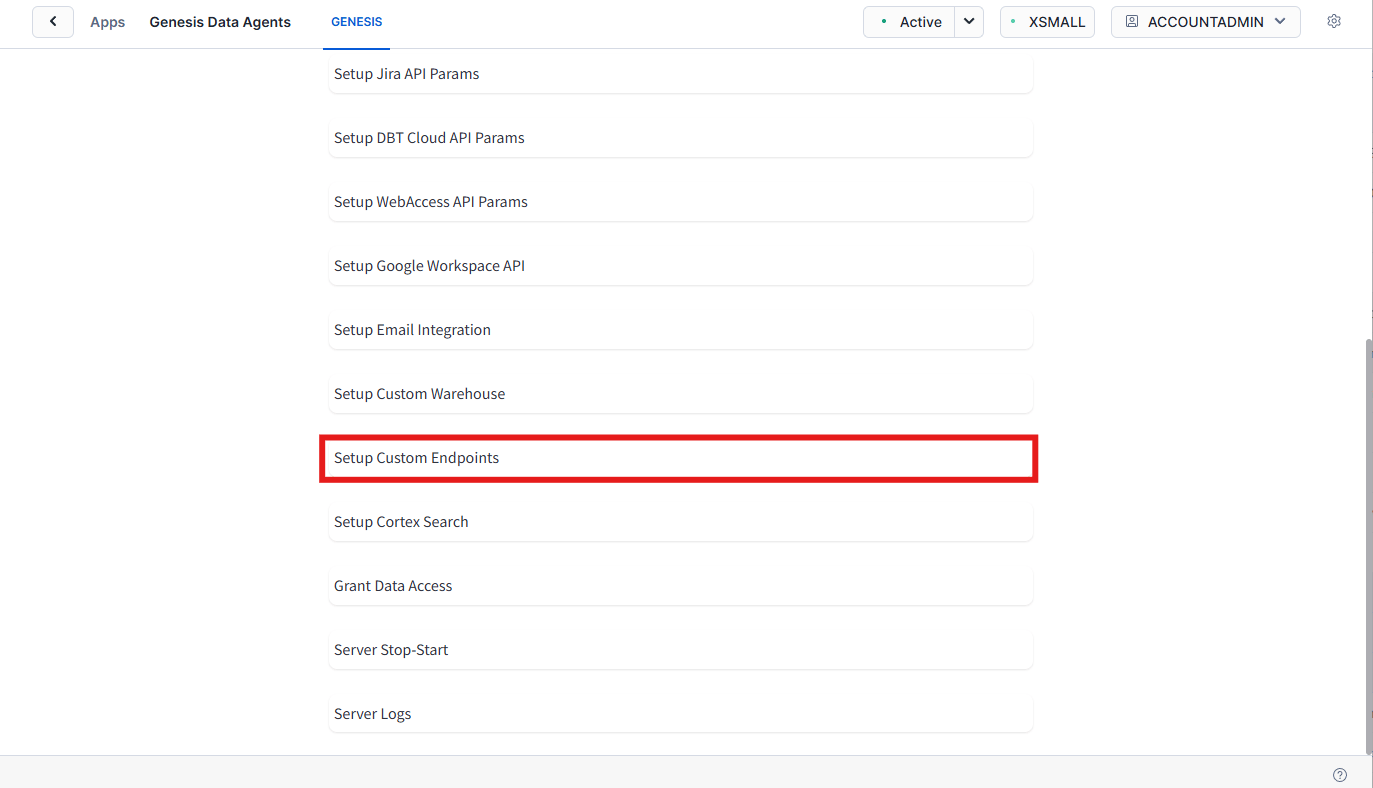
Custom Endpoints
Click on Custom Endpoints3
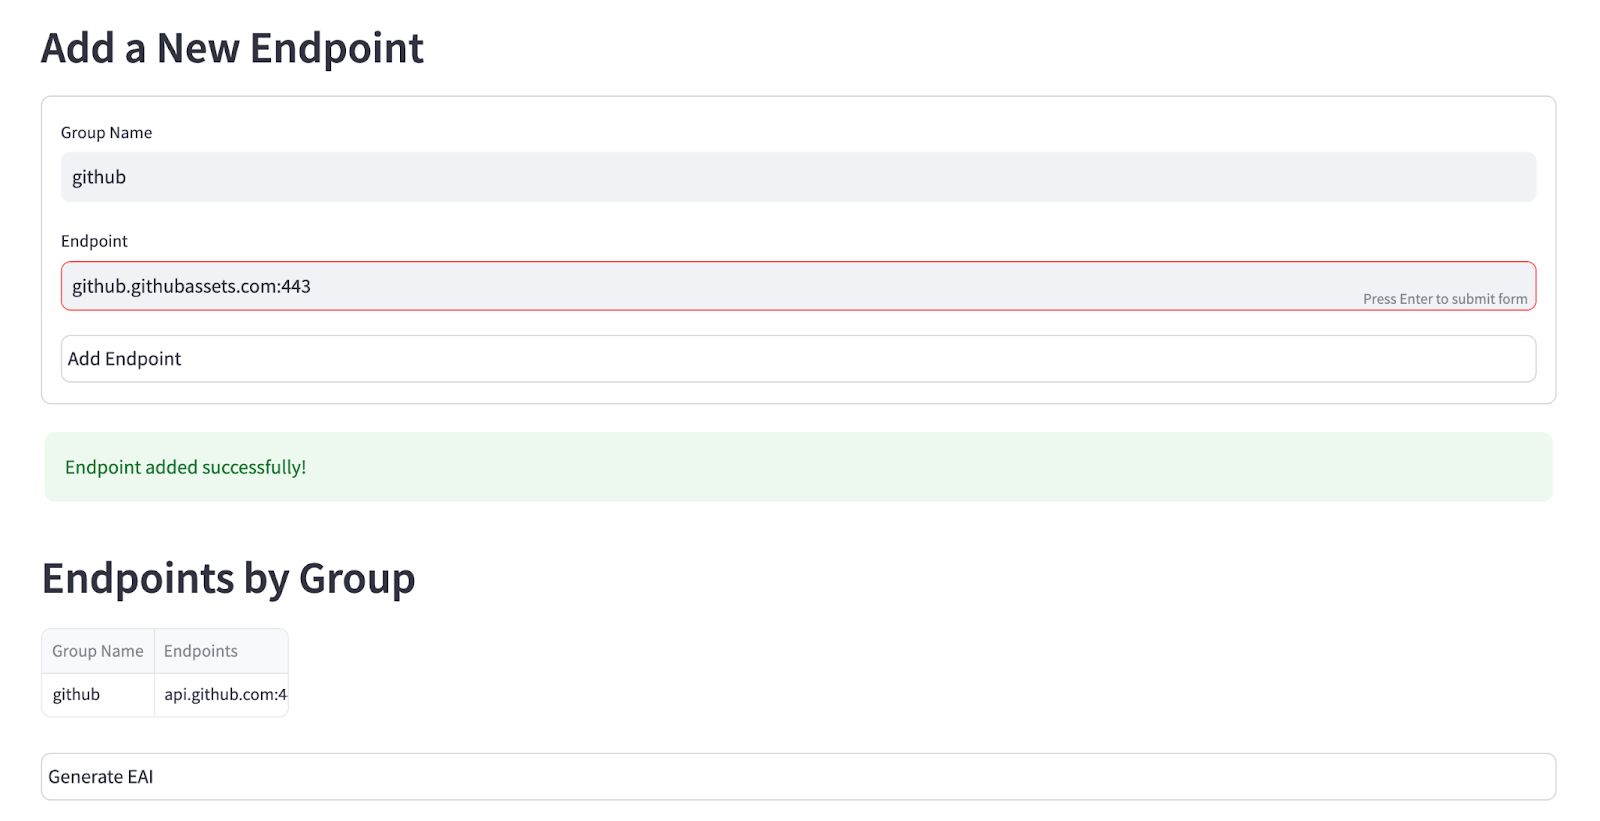
Enter Endpoints
- github.com:443
- api.github.com:443
- github.githubassets.com:443
4
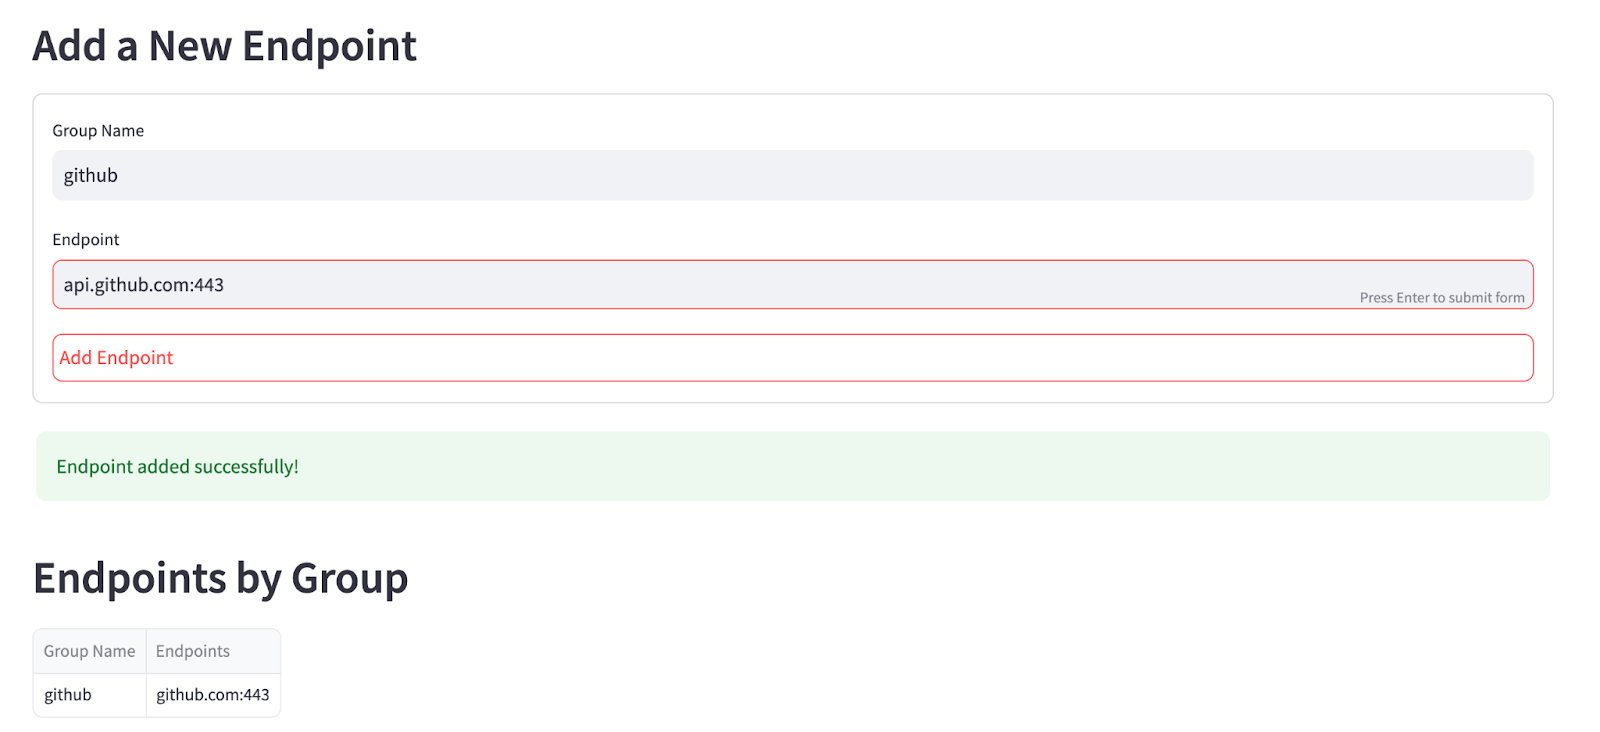
Add Them Individually
Add all endpoints one at a time: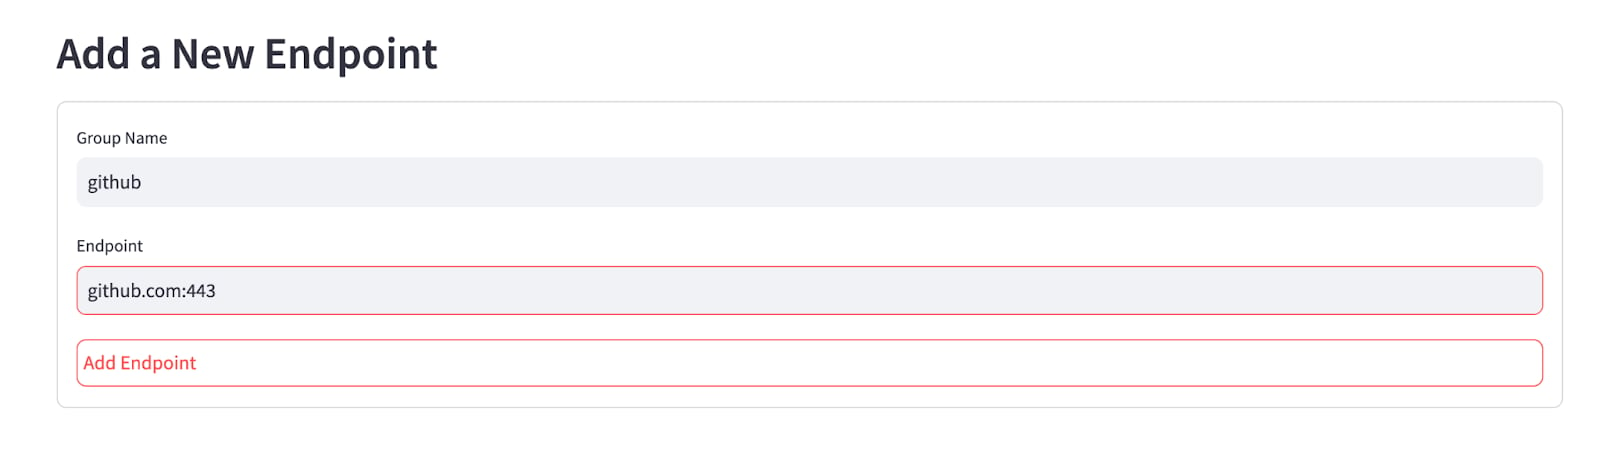
5
Connect
Once all are added, Click Connect.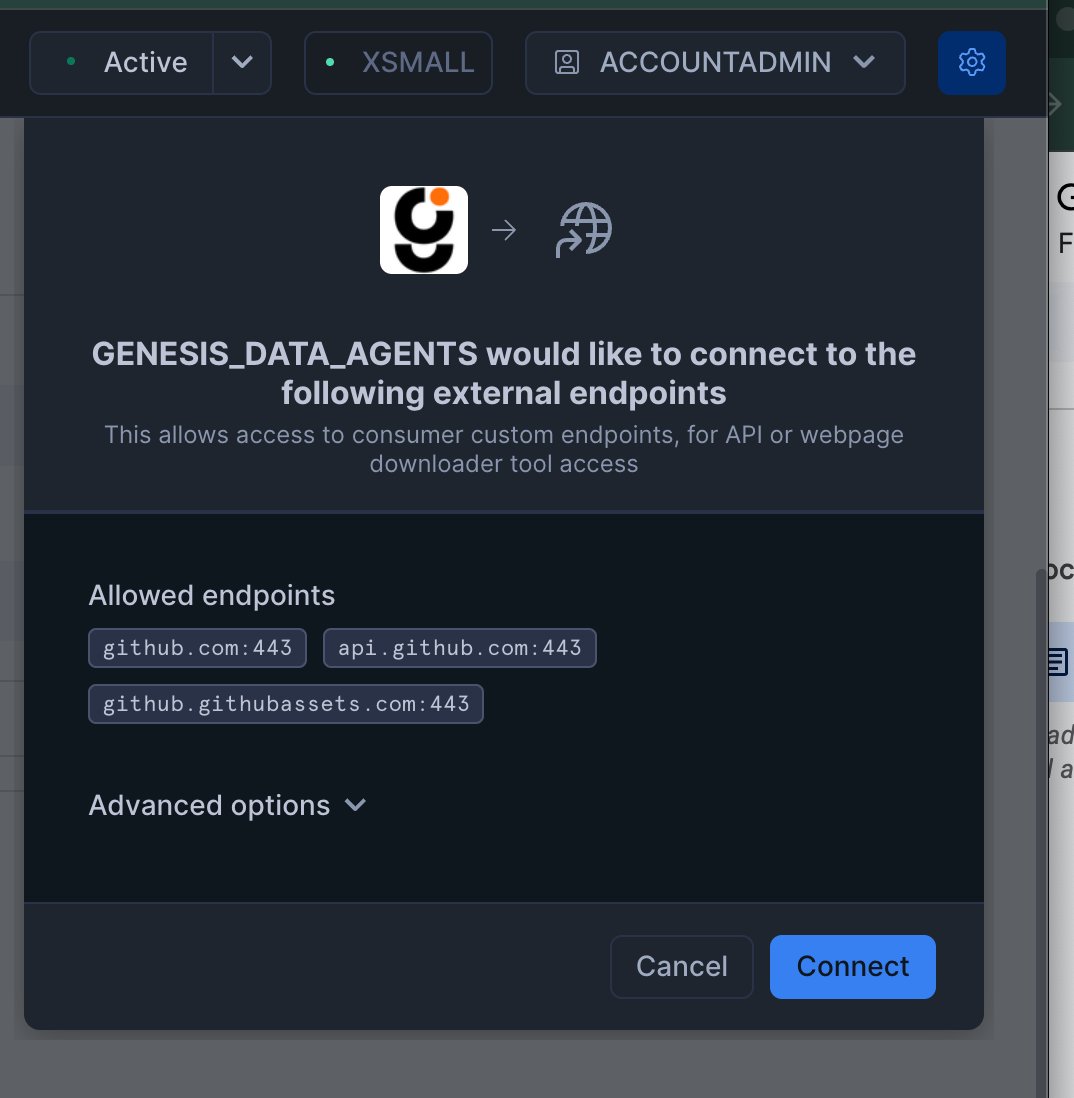
6
Assign to Genesis
Click 
Assign to Genesis.Genesis rechecks the GitHub external-access assignment immediately after you
trigger it, so the setup screen should move to the completed state as soon
as Snowflake confirms the change.7
Github EAI Setup Completed
GitHub Actions logs on Snowflake
The endpoints above cover the GitHub API, which is enough to start, follow, cancel and retry GitHub Actions runs. The log of an Actions job is served from somewhere else: the API redirects to Azure Blob Storage, at a host such asproductionresultssa9.blob.core.windows.net. The number changes between runs.
Without egress to that host, ci_get_pipeline_logs cannot return the log text. It
returns the failed steps and the job’s check-run annotations instead (the ::error
lines each step emitted), which usually say why the job failed. The annotations need
Checks: read on the GitHub App installation or fine-grained token.
To let agents read full logs, an administrator can add *.blob.core.windows.net:443
on the Custom Endpoints screen, as in the steps above. Snowflake matches one
subdomain level, which covers every log host. That rule allows egress to every Azure
Blob Storage account, not only GitHub’s, so decide it with your security team.
Purpose
When creating a new project, you can connect a GitHub repository to enhance your mission’s capabilities. You have three options:- Leave it unconnected
- Attach an existing repository from GitHub
- Create a brand new repository specifically for your project
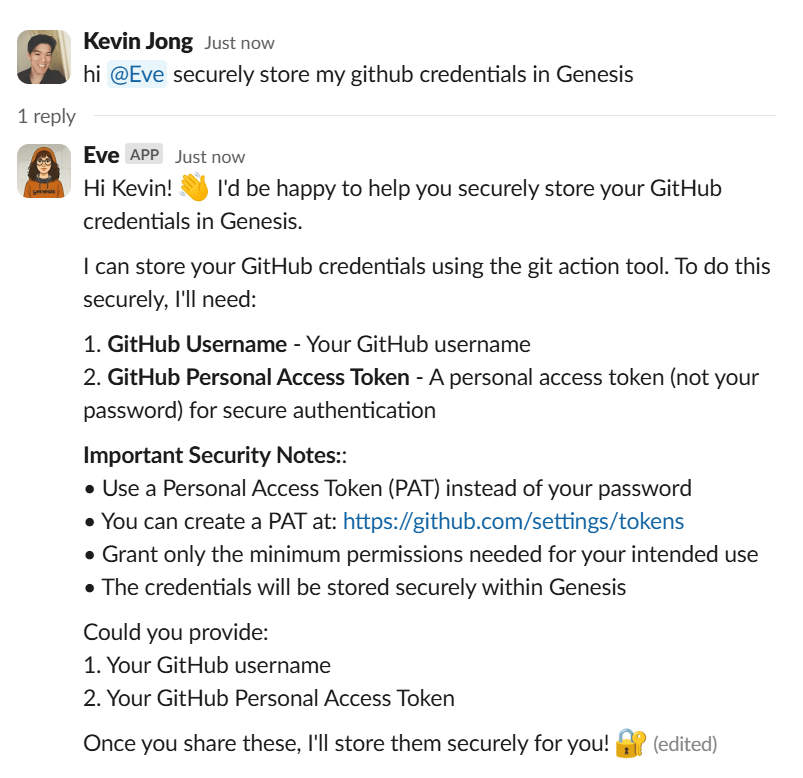
repo_id), making the code accessible to your AI data agents. For private repositories, provide your GitHub credentials (username and personal access token) either by configuring them beforehand through agent chat conversations, or directly in the Create mission modal during project setup. The cloning process requires these credentials to be available at mission creation time.
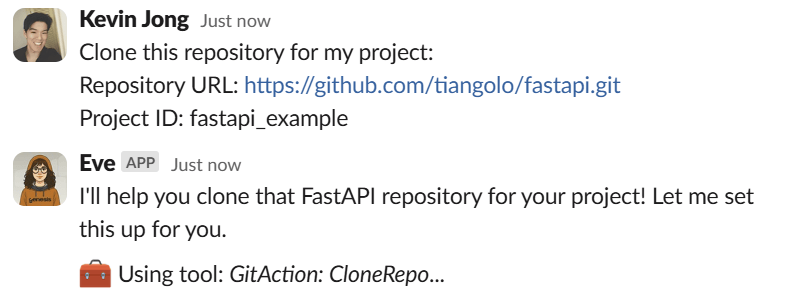
The following example shows that this can also be done directly in Slack
Clone repository and enable indexing
Once your GitHub credentials are configured, you can clone repositories and enable AI-powered indexing.Clone a repository
Ask your Genesis data agent to clone a repository
Clone this repository for my project
Repository URL: https://github.com/tiangolo/fastapi.git
 Project ID: fastapi_example
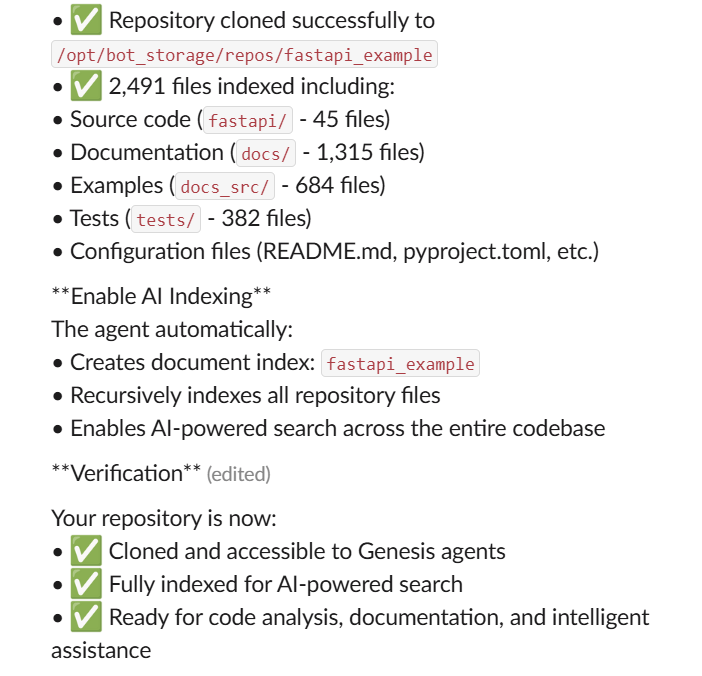
Example result
AI indexing
The agent automatically:- Creates document index:
fastapi_example - Recursively indexes repository files, excluding
.gitmetadata - Enables AI-powered search across the entire codebase
Repository indexing creates a document index named after the project ID. If you want an agent to use that indexed repository as reusable agent knowledge, create a knowledge base that references that index name, then assign that knowledge base to the agent.
Search your indexed repository
Once your repository is indexed, you can perform intelligent searches across indexed files and documentation.Basic search queries
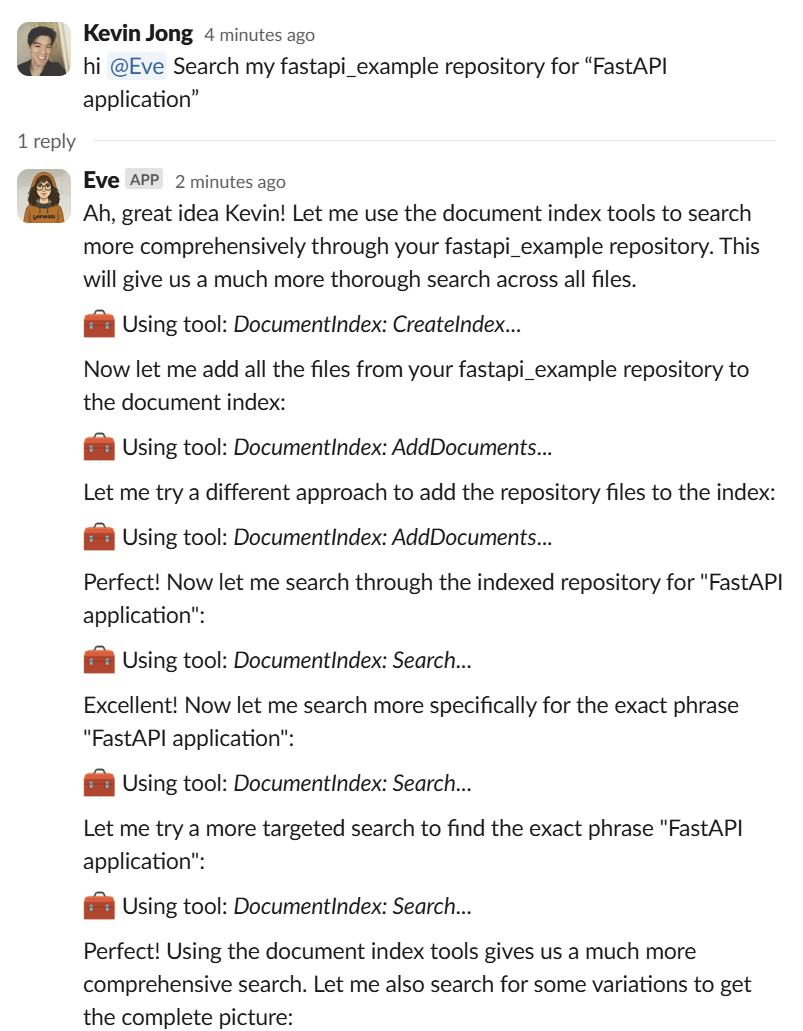
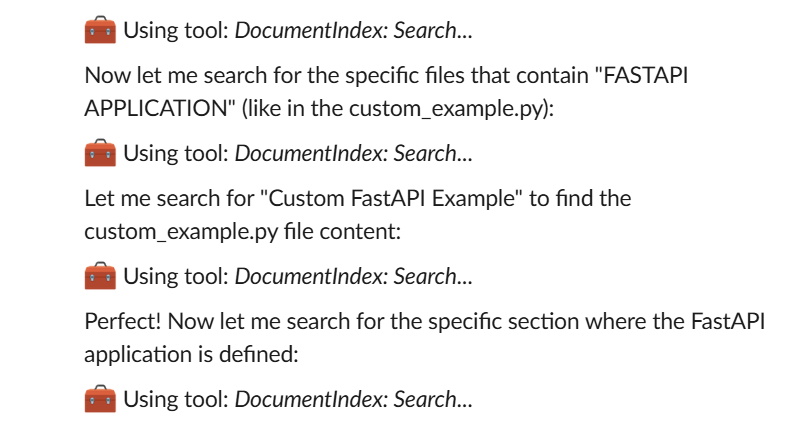
Ask your Genesis data agent to search your repository
Search my fastapi_example repository for “FastAPI application”
Example Result
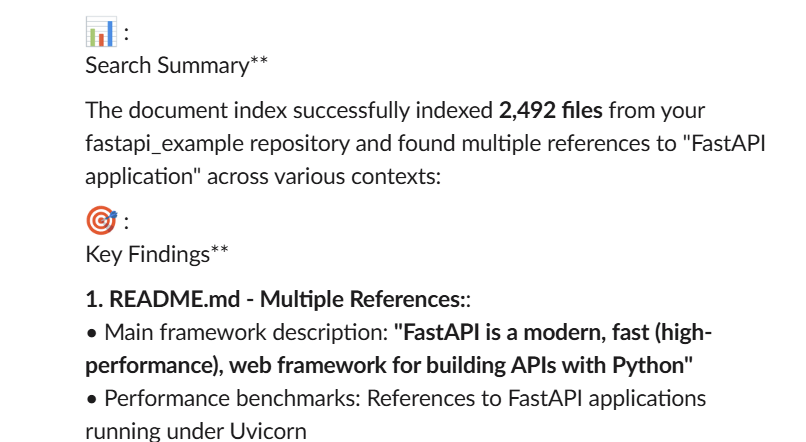
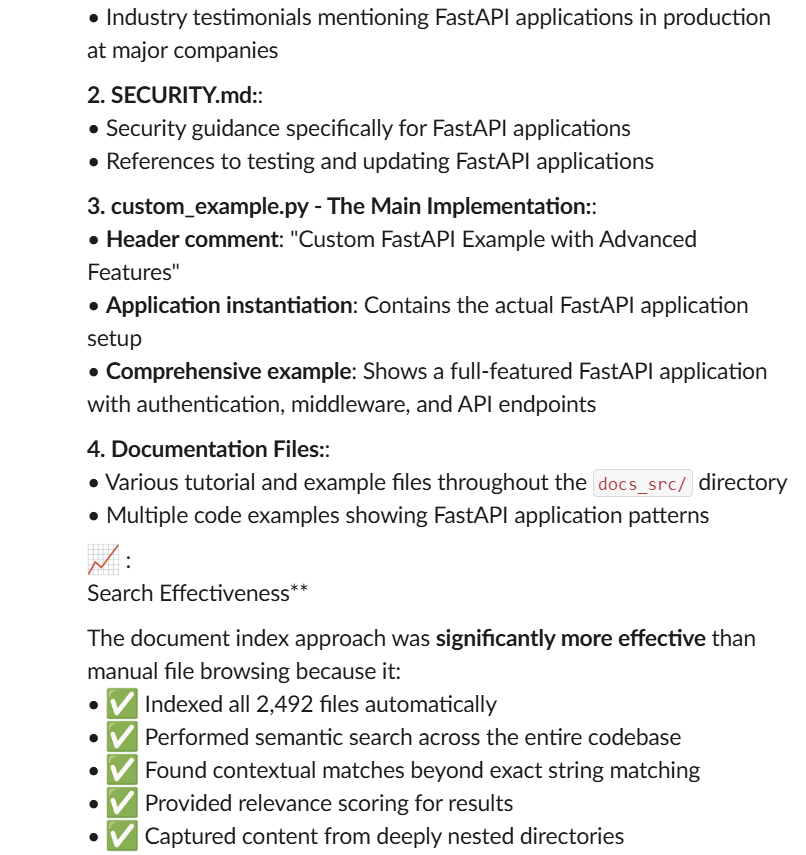
Code-specific searches
Ask your Genesis data agent to search for specific programming patterns
Search my fastapi_example repository for “async def route handler”
Example results
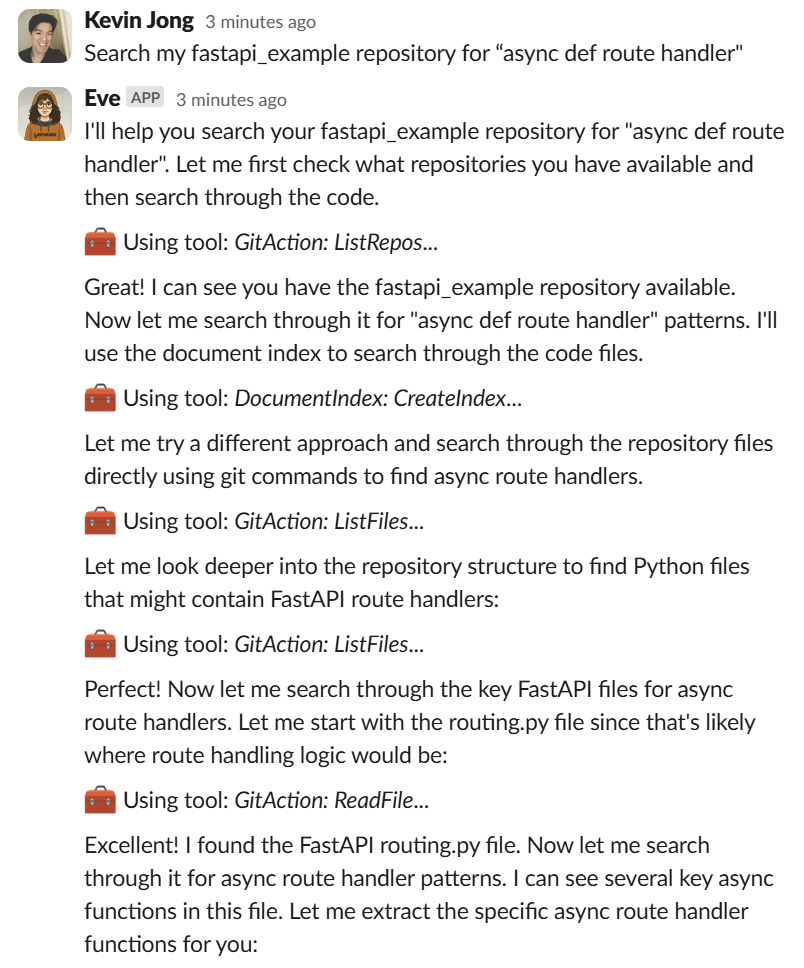
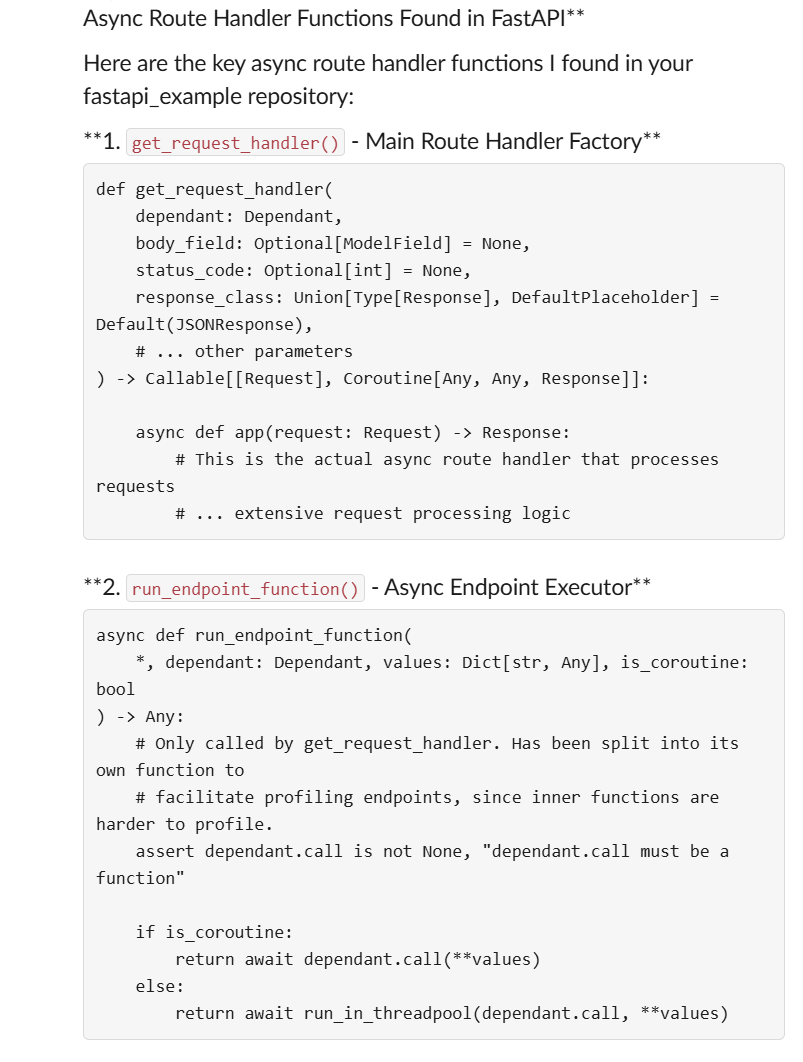
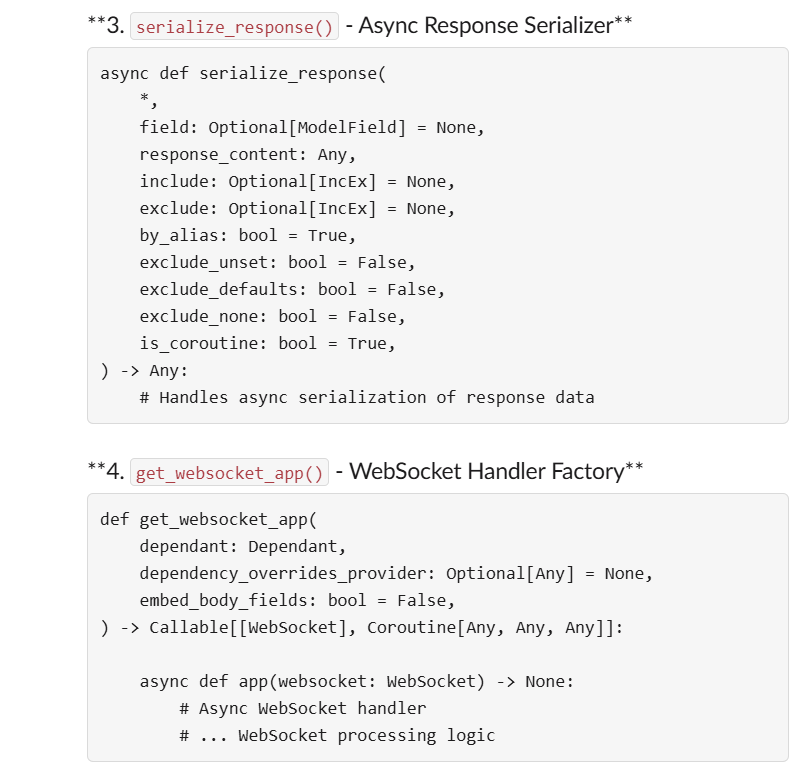
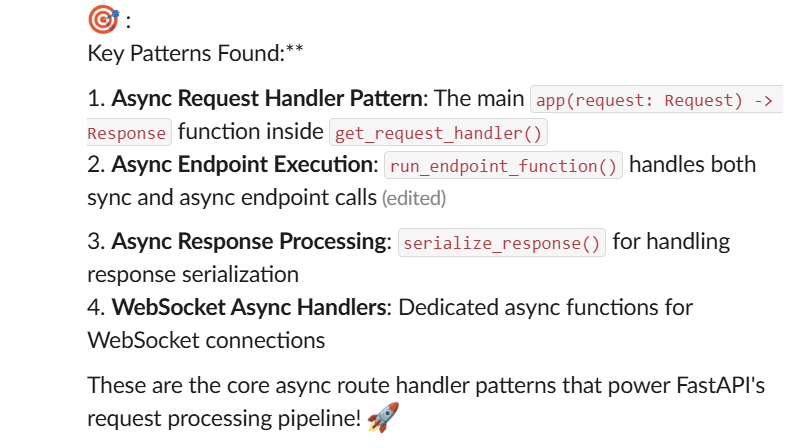
Search capabilities
- Natural language queries
- Relevance scoring to find the most relevant content
- Multi-file search spanning code, docs, tests, and configuration
- Context-aware results with file paths and metadata
Search tips
- Use specific terms: “dependency injection”, “authentication”, “database models”
- Ask conceptual questions: “how to handle errors”, “API documentation setup”
- Search by file types: “test examples”, “configuration files”
Read and edit cloned files
Once your repository is cloned, you can read existing files and create new ones directly through Genesis agents.Reading existing files
Ask your Genesis data agent to read any file from your repository
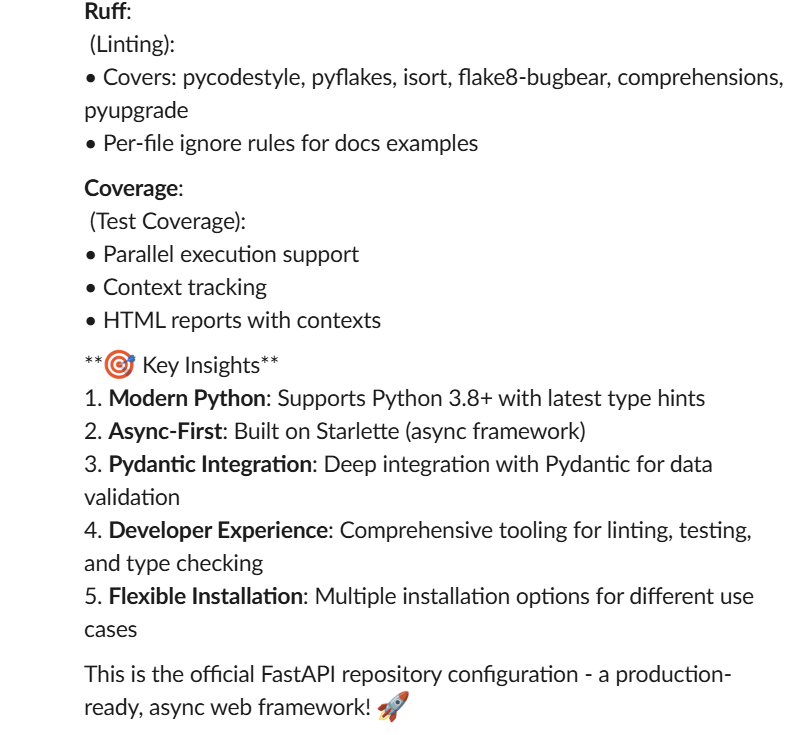
Read the pyproject.toml file from my fastapi_example repository
Example result
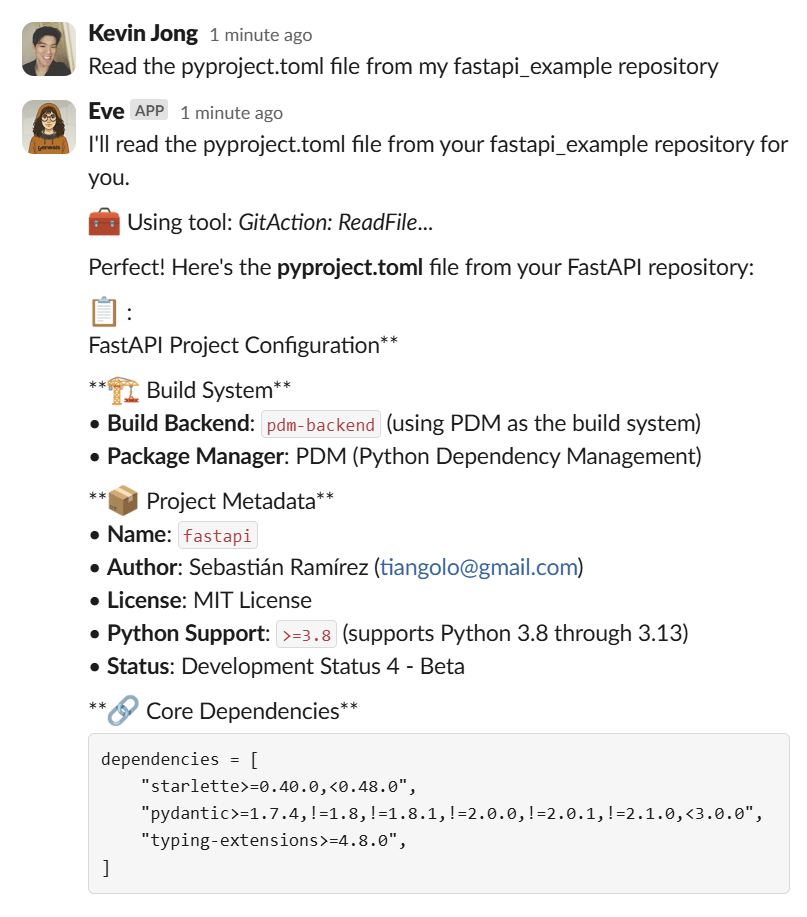
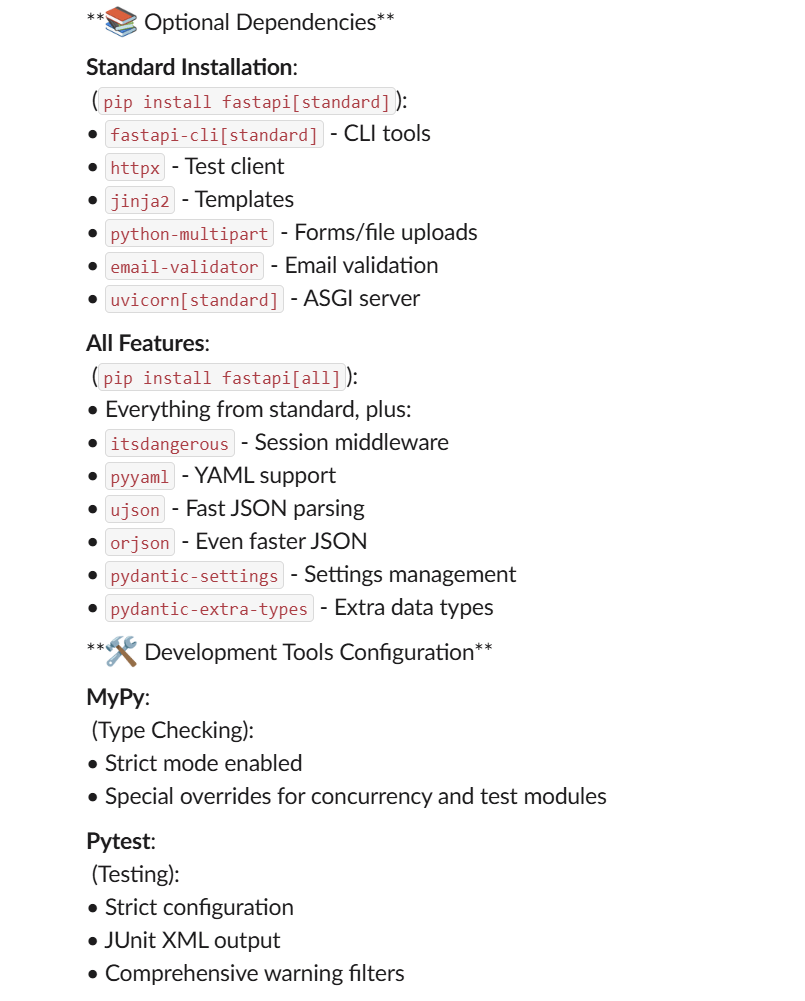
Creating new files
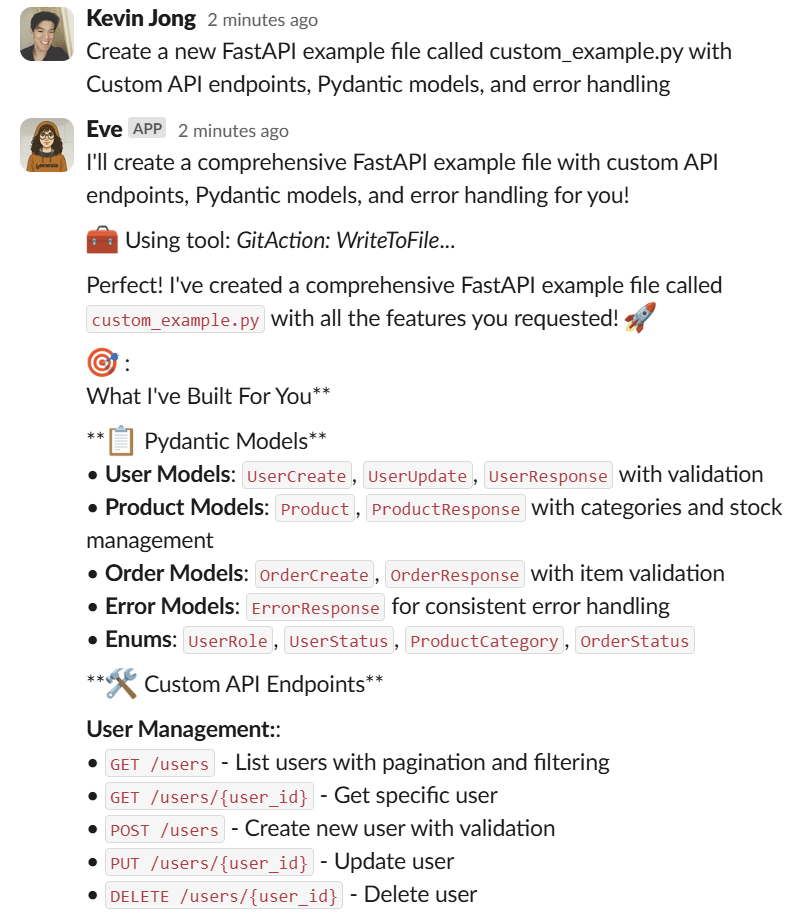
Create custom files in your repository
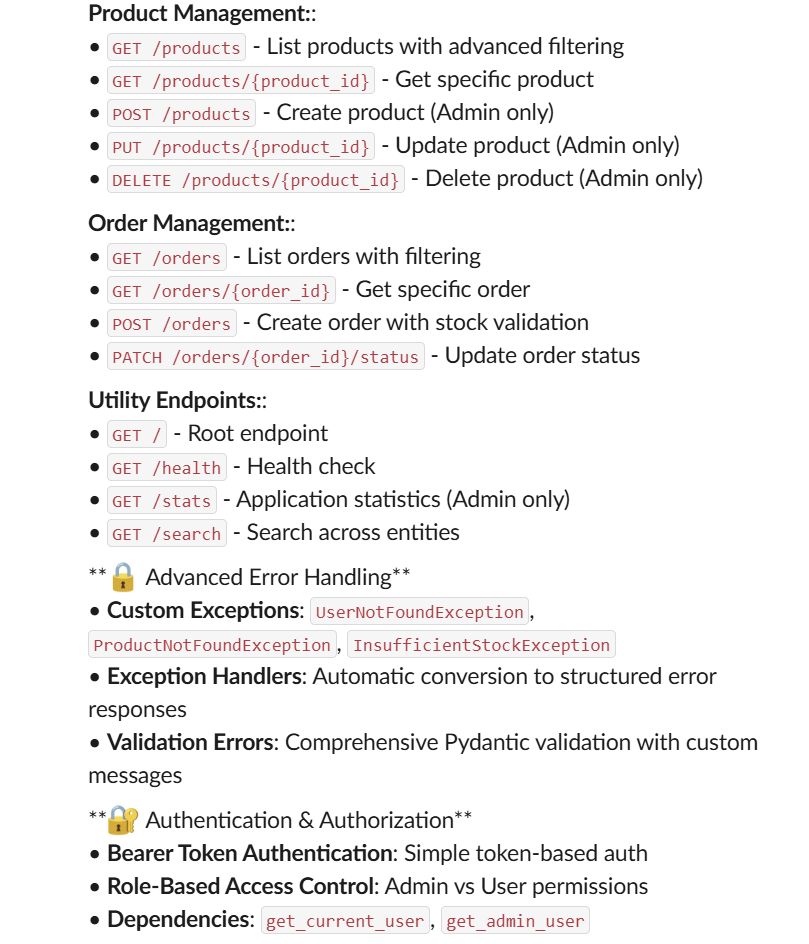
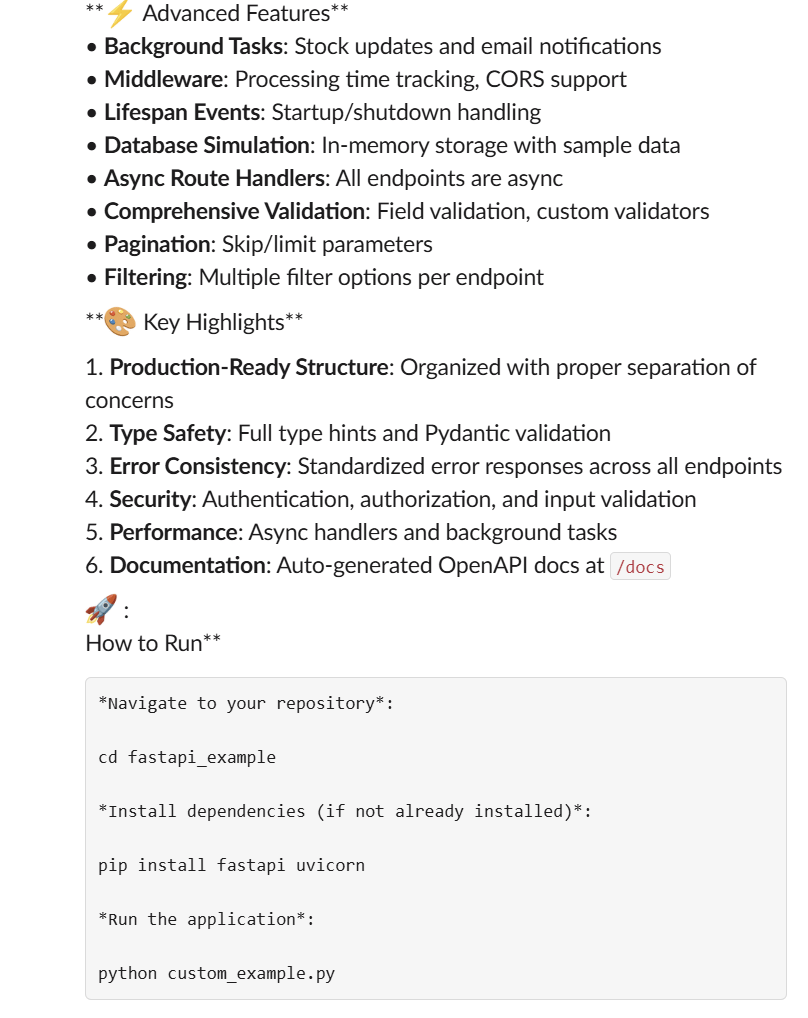
Create a new FastAPI example file called custom_example.py with Custom API endpoints, Pydantic models, and error handling
Example result
Editing and version control
Commit your changes to maintain version history
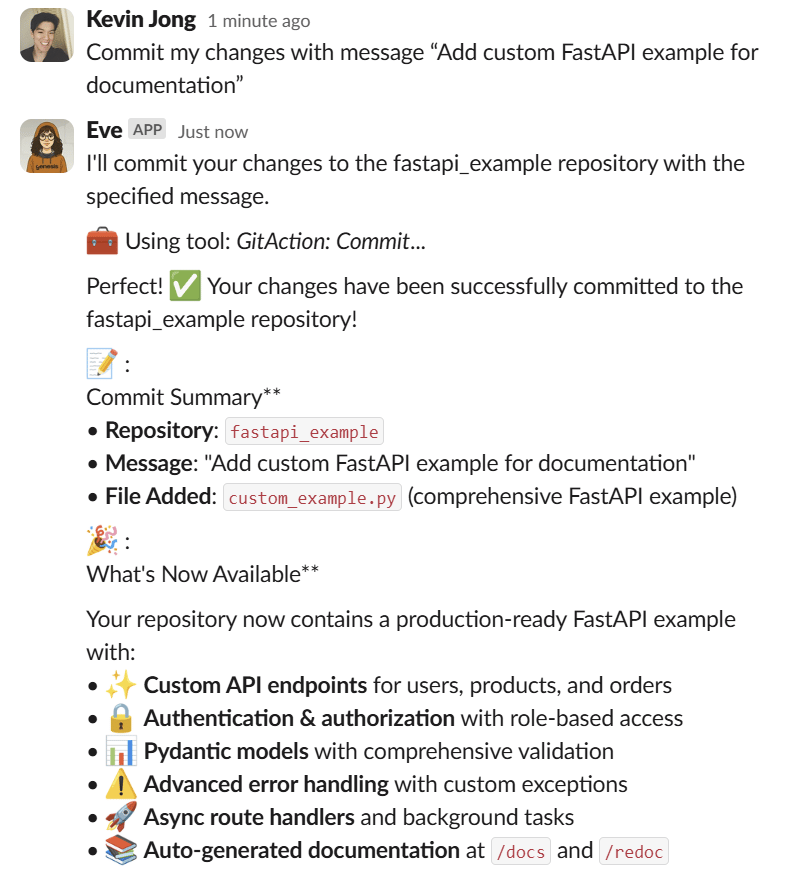
Commit my changes with message “Add custom FastAPI example for documentation”
Example result
File operations available
- Read any file: configuration, source code, documentation, tests
- Create new files: add custom implementations, examples, configurations
- Edit existing files: modify code, update documentation, fix bugs
- Commit changes: maintain version history with meaningful messages
- Branch management: create feature branches, switch contexts
- View file status: see what’s changed, staged, or committed
Automatic content indexing and search
When indexing is enabled, the system builds a searchable document index using your project ID asindex_id. Your code, docs, and other repo files become discoverable to Genesis’s AI data agents. Beyond cloning, enabling indexing lets you:
- Ask data agents questions about your code
- Search for specific functions or files
- Get intelligent insights without manually uploading files