

Overview
The Missions workspace is the main home for long-running, multi-step work in Genesis. Customers use it to launch or import missions, monitor progress, inspect task state, switch between board and list task layouts, review outputs, and return to the mission thread that powers the workflow.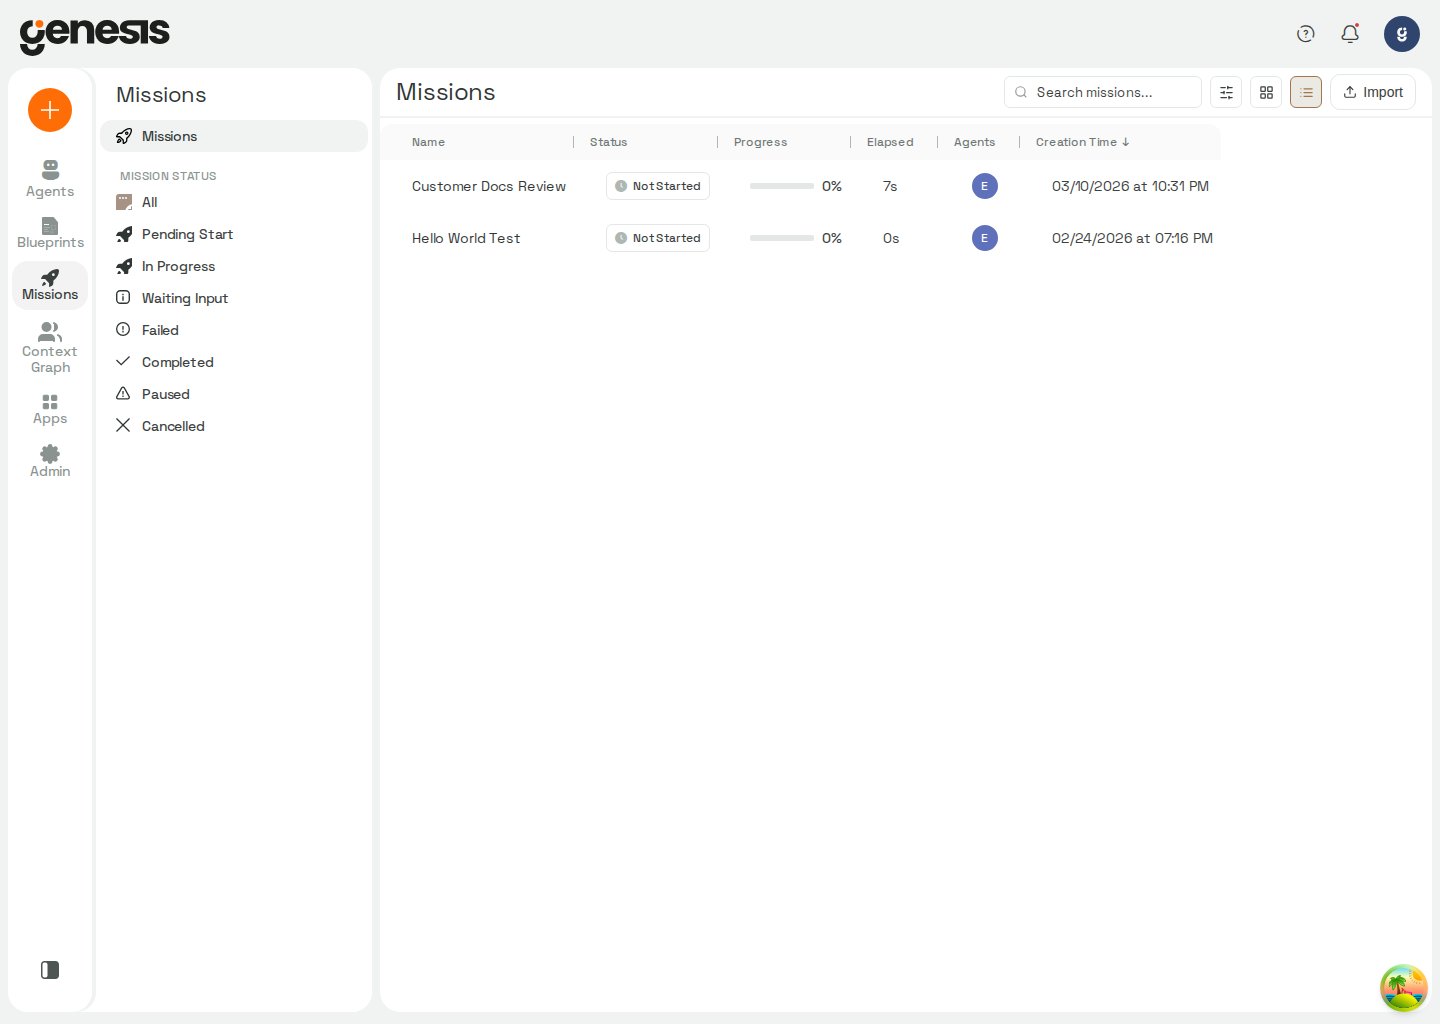
Mission Center
Mission Center supports the core mission-management workflow:- open the guided Create Mission page to describe a goal and get blueprint recommendations,
- search missions by name,
- filter by status, one or more tags, or one or more creators,
- sort list view by name, creation time, or creator,
- switch between list and grid views,
- load older missions with Load more when the list spans more than one page,
- rename a mission from the mission actions menu in either list or grid view,
- import a mission package,
- open a mission detail page.
localStorage. If Today
is selected on arrival and the loaded list has missions but none created today,
Mission Center opens History instead; when Today is empty, you can also
select View history in the empty state. On first visit with no active filters,
Genesis also applies the demo:gold tag so gold-path Sales Engineering vignettes
(migration suites, client_file_onboarding, demo_dashboard_root_cause, and
related demos) appear by default. Clear or change tag filters any time from
Filter missions.
When tag or creator filters are active, Mission Center keeps the selected
values visible as chips beside the filter control so you can confirm the
current filter set at a glance and clear all selected tags or creators from the
header without reopening the filter menu.
In list view, the Creator column shows who started each mission. When both a
display name and email are available, the name appears on the first line and the
email on the second. Missions created by the built-in system identity are
labeled System User. Click the Creator or Creation Time column
header to sort; each click cycles through descending, ascending, and default
name order.
Within the same browser session, Mission Center also remembers the current
search text, sort order, status filter, selected tags, and selected creators
when you leave the list and return through normal navigation.
Mission Center loads missions in pages of up to 1,000 rows. When more missions
match your current filters, a Load more button appears at the bottom of
grid and list views. Select it to append the next page; the button hides once
every matching mission is visible. Changing search, filters, or sort order
returns to the first page.
In the header, open Filter missions and use the Status dropdown to narrow
the mission list. Use the Creator section to filter by one or more mission
creators; the dropdown is searchable and lists each creator by display name,
email, or user id. All statuses is the default and shows every mission.
All Not Completed shows missions that have not reached a terminal outcome:
not started, in progress, awaiting input, stuck, and paused missions are
included; completed, failed, cancelled, and retired missions are excluded. Use
the Retired status when you need to find missions that were stopped early and
are permanently closed. Retired missions remain visible in the full list and have
a terminal status distinct from Completed.
Use All Not Completed when you want a single view of open work without picking
a narrower status such as In Progress or Awaiting Input.
Create a mission from a goal
From Mission Center, select the Create Mission button in the page header to open the full-page guided mission-creation flow.- Describe the data goal in plain language, or start from one of the suggested prompts.
- If Genesis needs more context, it asks up to two clarifying questions, one at a time.
- Genesis returns up to three ranked blueprint recommendations with fit rationale, match strength, and blueprint details.
- Select Start Mission with this Blueprint to open the standard blueprint mission setup flow.
Mission detail tabs
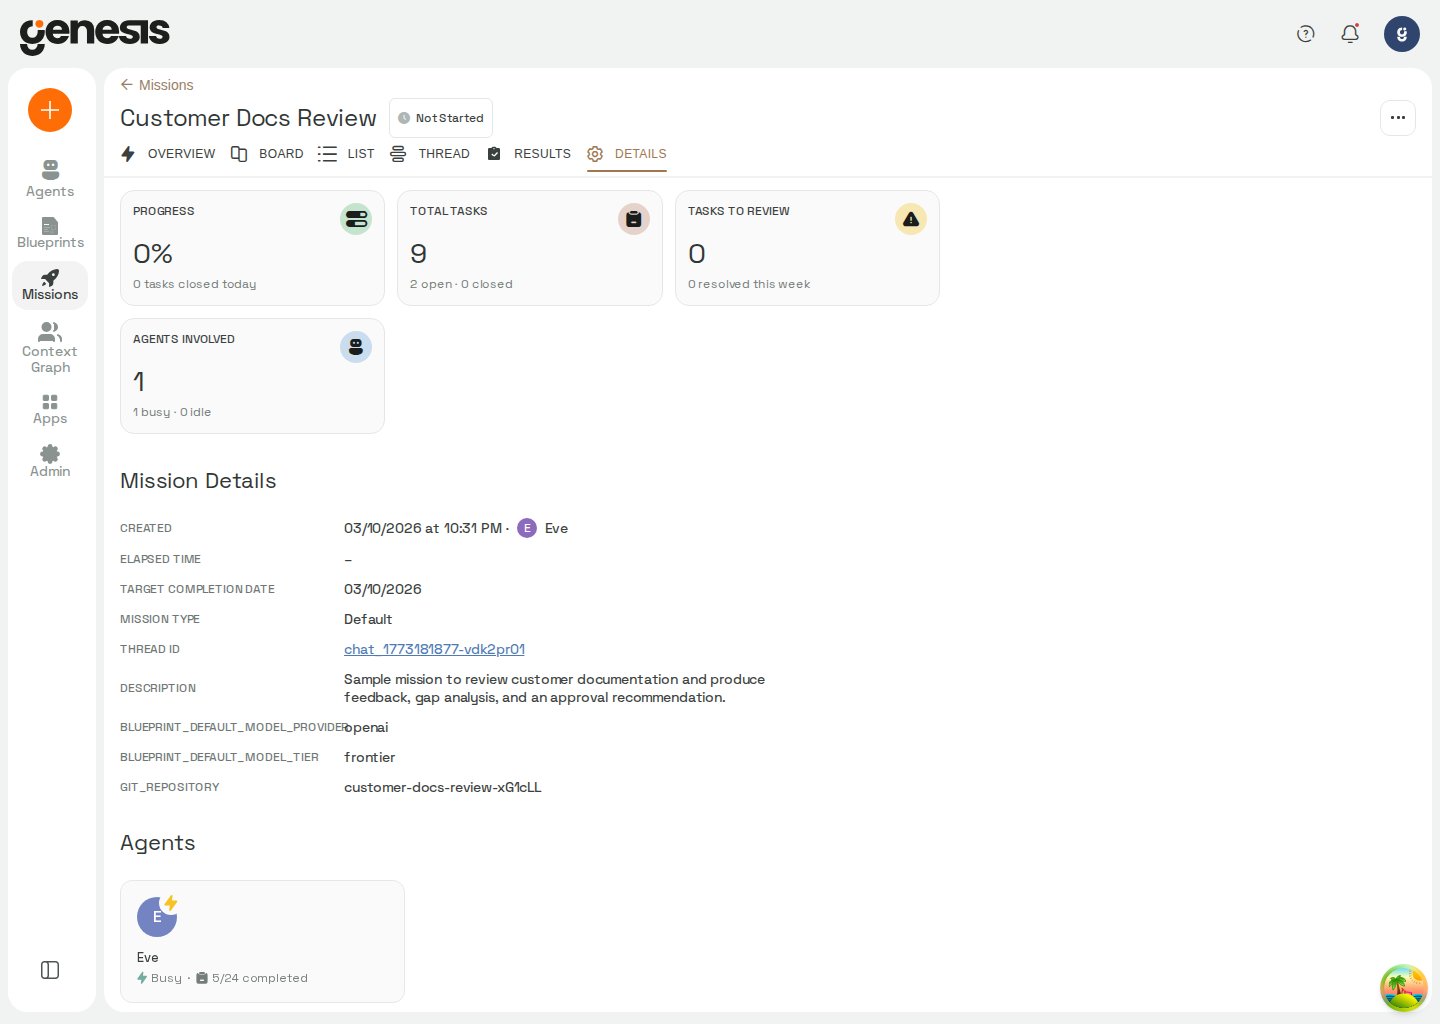
A mission detail page is organized into multiple customer-facing tabs:
The Thread tab also shows a background-work card above the composer when the
mission thread is waiting on a run the agent started. The card keeps the run visible
while the thread is idle; dismissing it hides the card but does not stop the run or
prevent its completion from waking the thread.
When a mission is part of a multi-blueprint journey or has spawned blueprint
handoff threads, a Blueprint chain strip appears above the tabs. Select a
stage pill to open that blueprint’s thread on the Thread tab. Stages that
have not started yet appear as dashed pills labeled Expected; plan-only
missions may show later runner or validator stages as Skipped. Optional
stages (such as incremental CDC testing) are labeled Optional when they are
still expected. Validator-delegated runner re-fires show a green
Remediation badge; when the validator re-fires the runner more than once,
those rounds collapse into one expandable group (for example ×2) so you can
open each corrective mission individually.
A pulsing green dot on a stage pill marks the mission that is running now —
independent of which stage you are viewing. This stays accurate when work moves
back to an earlier runner during remediation (for example validator → runner
re-fire) while you remain on the validator thread.
When the chain hands work to a newly spawned mission thread while you are
viewing another stage — a forward runner → validator handoff or a remediation
re-fire — Genesis shows a clickable toast (for example Mission handed off to
… — click to follow). The toast stays visible until you click it (to open
that stage on the Thread tab), dismiss it, or leave the mission screen — it
does not auto-dismiss. Each new handoff appears only once; Genesis does not
re-show toasts for chain stages you have already seen.
When the mission carries a presenter-selected
coding_agent blueprint input,
the chain strip also shows a compact badge (for example Claude Code) beside
the chain label.
See Blueprint journeys and chain navigation
for how journey recipes, structured inputs, and handoff metadata drive the
strip.
Use the view toggle in the Board tab to switch between the two task layouts without leaving the mission detail page.
You can rename a mission from the mission detail header in two ways:
- select Rename mission from the header actions menu,
- click the mission title directly, update it inline, then press Enter or click away to save. Press Escape to cancel.
Overview tab: Document Flow and database activity
The Overview tab hosts the live mission panel, including Document Flow — a graph of blueprint phases, input and output documents, and per-phase database activity on saved connections. For how missions select the source for phase details and files, see Blueprint Library and Missions. For each blueprint phase, Genesis can attach one or more database connection nodes per saved connection:- READ nodes (purple) appear upstream of the phase. They represent
read-classified SQL — such as
SELECT,SHOW, andDESCRIBE— against that connection during the phase. - WRITE nodes (amber) appear downstream of the phase. They represent
write-classified SQL — such as
INSERT,UPDATE,MERGE,CREATE, andDROP— against that connection during the phase.
Mission replay
When replay event data is available for a mission, the Overview live panel includes media-style controls at the bottom of the panel:- scrub the timeline, play or pause, skip ±10 seconds, and jump between checkpoints,
- switch between Live (follow the mission in real time) and Replay by dragging the scrubber to the end or away from it,
- adjust playback speed when not in live mode.
current / total) is the replay duration, not the
mission’s wall-clock runtime. Genesis compresses idle gaps — for example, long
waits while the assistant awaits your input, or stretches with only status
updates and no active work — so replays stay watchable. Brief pauses remain
before user messages and when the mission is Awaiting Input. Any remaining
idle gaps longer than one minute are capped so the total replay length stays
close to active work time. Replays longer than one hour show time as H:MM:SS;
shorter replays use M:SS.
When replaying a mission, Document Flow filters database activity through the
replay cutoff timestamp so only SQL that had run at that point in the replay
appears.
Prover progress in missions
When a migration validation or system-diff run emits Prover progress, the Overview live panel adds a Prover tab. A newly observed live run selects the tab and opens its panel automatically; Prover runs already present when the mission loads remain available without taking focus. Select the tab to watch the run while it is executing, or move the mission replay timeline through the same events to review a recording later. A Prover-only recording can be replayed even when the mission thread has no assistant output at that point. Use the panel’s expand control to enlarge the Prover view. Select the control again, press Escape, or click outside the expanded panel to return to the mission flow views. The live panel also offers a fullscreen Mission Data Flow view for transformation-oriented lineage across phases. Use Document Flow when you want phase-scoped document and connection context; use Mission Data Flow for transformation graphs. When a phase ran a Prover proof, Document Flow places a Proof card on that phase. Re-runs stay grouped on one card: it shows the latest proof and a count of the proofs the phase ran. Select the card to open the full comparison. In Live, an in-progress proof card settles when the run does; in Replay, it does not fetch a newer result from the live run.Context Graph traversal
When a live mission produces a new context-graph traversal, the live panel selects Context Graph automatically and opens the traversal view. The first walk state loaded for the mission is treated as the baseline, so opening an existing mission does not replay an earlier traversal or switch views unexpectedly. Each traversal is activated only once. The Context Graph tab appears while a traversal is available. To return to the other flow views, select Collapse in the upper-right corner, press Escape, or click outside the expanded graph. Switching flow views preserves the current mission context without replaying the previous traversal.Overview panel layout
On desktop, the Overview live panel uses resizable horizontal and vertical dividers so you can balance the work log, artifacts tree, and Document Flow graph. Drag either divider to resize; hover a divider or the corner handle at their intersection to highlight both splits. Drag the corner handle to resize both panels at once. With the corner handle focused, use the arrow keys (hold Shift for larger steps) to adjust layout from the keyboard. Corner resize is not shown on narrow mobile layouts.What users can do
- start or import a mission, including from the guided Create Mission recommendation flow,
- pause, resume, or cancel a mission when those actions are available,
- rename a mission from Mission Center or directly from the mission detail title,
- open the current mission debrief from the mission header,
- export a mission package,
- review tasks from the Board tab and switch between board and list layouts,
- generate or refresh a debrief for the linked mission thread,
- answer follow-up questions when a mission needs input,
- open the thread or results without leaving the mission context.
BlueprintRun external gates
Missions started through Programmatic BlueprintRun can pause on external input gates that only a host application (or operator with API access) can clear. While a gate is open:- Mission Center lists the mission as Awaiting Input (distinct from generic in-progress work).
- A mission-wide external gate ribbon appears above the mission tabs with
phase, purpose, auto-continue countdown when configured, API details
(run id,
input_id, examplePOST /api/runs/{run_id}/input/{input_id}), and Apply default & continue now when exactly one gate has adefault_afterpolicy. - The Thread tab shows that chat messages do not satisfy the gate; use the
ribbon or your host integration to post
commitordetails.
inputs (for
example catalog_repo_id), Genesis shows a Host catalog strip on the mission
with that repo id so operators know which read-only catalog the external app wired.
Mission results and follow-up work
The mission thread and mission Outputs tab are designed to work together: the thread explains what happened, while the Outputs tab exposes the generated files, repositories, and deliverables. On the Details tab, Genesis links to the Blueprint when it can resolve a name fromblueprint_name, the active blueprint_phase, or a Blueprint:
marker in the mission description. When a stable blueprint_id is stored on
the mission, the link preserves that identity in the Blueprint detail URL.
Mission and thread debriefs
Genesis supports three debrief scopes:Single-mission debrief (header action)
From a mission detail page that is not part of a multi-stage Journey, select Debrief in the page header to open the current mission debrief. If Genesis has not generated one yet, it creates the debrief first and then opens it in a fullscreen modal without leaving the mission view. Mission debriefs are section-based summaries. Depending on what the mission produced, Genesis can show an overview, the original ask, a phase walkthrough, lineage and downstream consumers, a conversion diff, migration code, migration run details, a reconciliation verdict, open decisions, lessons captured to the Context Graph wiki, the audit trail, repository layout, and recommended next steps. When a mission is part of a Journey (two or more spawned chain nodes or two or more planned journey stages), Genesis hides the header Debrief action and shows a Debrief tab on the root mission instead. Child missions in the chain still expose per-mission debriefs from within the Journey debrief view.Journey debrief tab
The Debrief tab appears on the root mission when Genesis detects a multi-stage Blueprint chain. Genesis opens the tab on the root project even when you navigate from a child mission in the chain (?tab=debrief).
On first open, Genesis generates or refreshes a Journey aggregate debrief via
POST /api/debriefs with source.kind="journey" and the root project_id.
The tab shows:
- Journey title, variant label, overall status, headline, and narrative (LLM synthesis when available, with deterministic fallback when the Journey is incomplete or synthesis fails),
- Per-stage outcomes aligned to the Blueprint chain stepper — expand a stage for phase summaries, checklist rollups, and validation verdicts when recorded,
- Source and target connection context,
- Database activity (reads and writes grouped by phase and connection), decisions needing attention, and recommended next steps,
- Links to open each spawned stage’s mission workspace or drill into its child
mission debrief (
?debrief_id=<id>on the Journey tab).
debrief_id from the URL.
If the Blueprint chain cannot be loaded while you are on the Debrief tab,
Genesis shows a retry prompt so you can restore Journey context before viewing
the debrief.