

Overview
The Branding page controls the visual defaults Genesis uses across generated experiences. Use it to set your organization name, define the brand color palette, upload square and wide logos, and provide guidance that GenesisApps should follow. Uploaded logos are always applied to Genesis-generated apps. They can also replace the Genesis logo in the upper-left of the main platform header, which is off until you turn it on.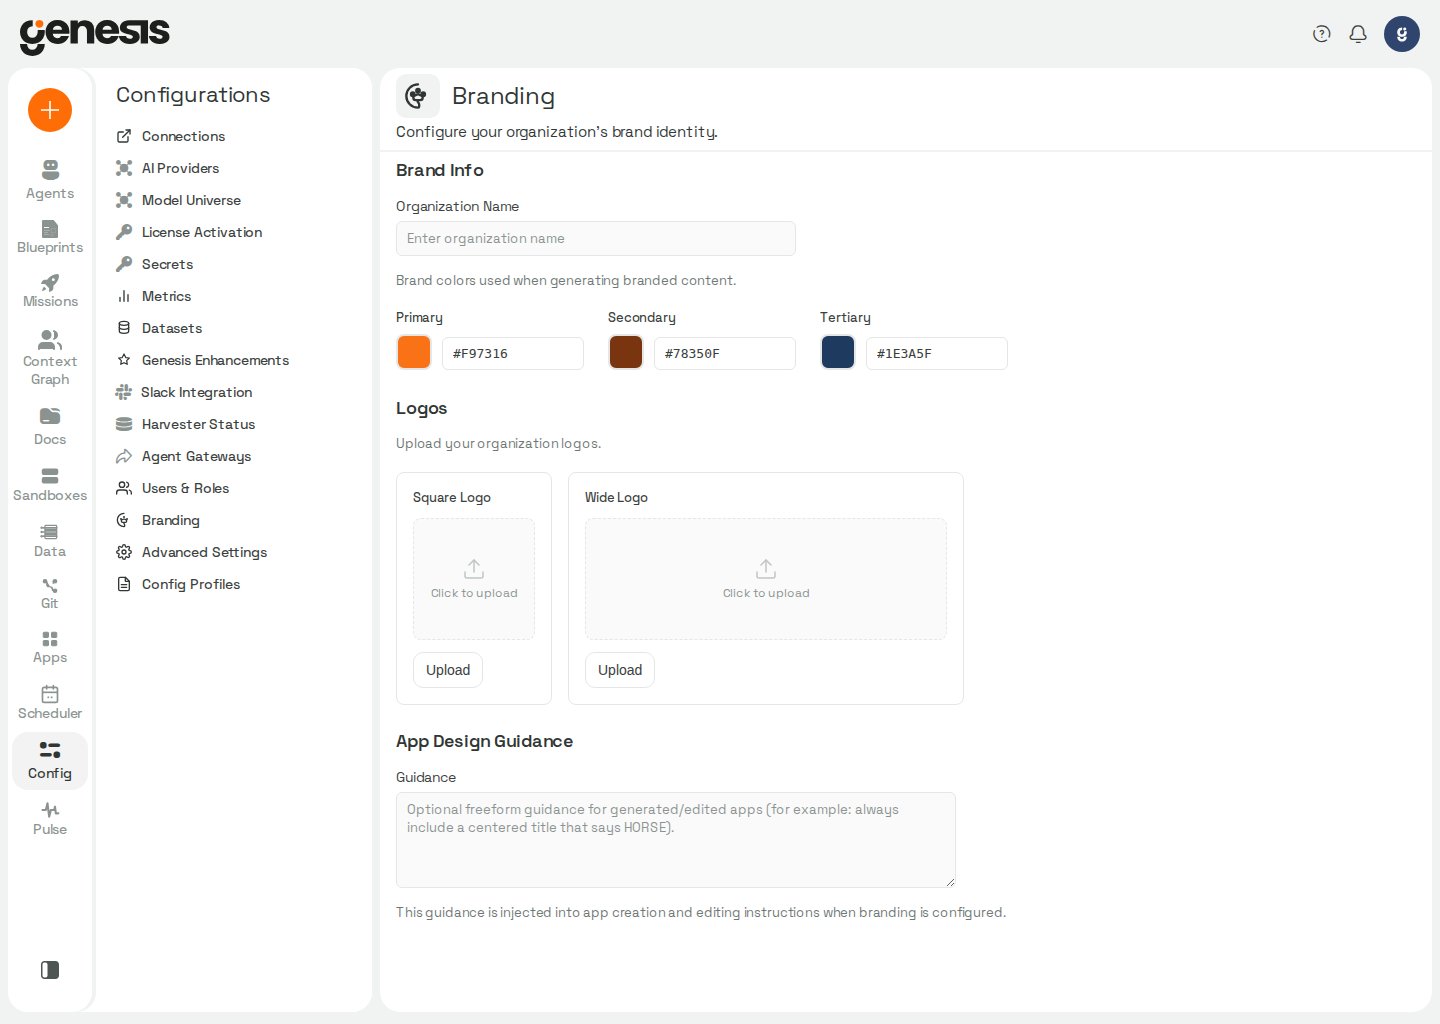
Genesis applies branding to generated apps only after you set an organization name or upload at least one logo. Saving colors alone does not activate branded app output.
What you can manage
Logo requirements
The UI accepts PNG, JPEG, or SVG uploads up to 2 MB. Genesis renders a live preview after upload so you can validate each asset before saving.White-labeling the main header
Also use this logo in the Genesis header sits under the Logos section and is off by default — uploading a logo never changes the platform header on its own, so an upgrade never alters the look of an existing deployment. Turn it on to white-label the header. While it is on, your logo replaces the Genesis logo in the upper-left of every page:- The wide logo is used, because it matches the shape of the header slot.
- If you have uploaded only a square logo, that is used instead, scaled to the header height.
- If neither is uploaded, the header keeps the Genesis logo.
When your logo is shown in the header, a small “Powered by Genesis” mark appears on the right-hand side of the header.
Light and dark mode
The header background is light in light mode and near-black in dark mode, so a single asset does not always work in both. A logo drawn in dark ink on a transparent background is the common case: it reads well in light mode and all but disappears in dark mode. Header logo variants appears under the header toggle with one entry per theme. Each starts on Same as default logo, which is the behavior you get without doing anything — that theme uses your wide (or square) logo. Clear the checkbox for a theme to upload an asset used only there, and tick it again to delete that asset and go back to the default. Genesis never recolors, inverts, or tints your logo — supply the variant rather than having us derive one. Each variant is previewed against the header background it will actually sit on, so a light-ink asset shows against the dark header while you are editing it. The two themes are independent: overriding dark mode leaves light mode on the default logo. Resolution for the active theme is that theme’s variant, then the wide logo, then the square logo, then the Genesis logo.Variants apply to the main Genesis header only. Generated apps always receive the square and wide logos, and are unaffected by the variants and by the header toggle.
Automation surface
GET /api/config/branding and GET /api/config/branding/logo/{logo_type} are
available to any authenticated user. PUT /api/config/branding and logo
upload/delete routes require access_config_panel.
The use_logo_in_header boolean (default false) controls whether uploaded
logos replace the Genesis mark in the main platform header. Set it through the
UI toggle, PUT /api/config/branding, or YAML under branding.use_logo_in_header
(see Config Profiles). When a logo is present,
square_logo_url and wide_logo_url in the API response include a ?v={version}
query parameter that changes only when that file is replaced.
Full request and response field reference: Genesis API — Branding endpoints.