NOTE: Genesis can also be deployed natively on Snowflake as a native application if you are the administrator of your Snowflake account. Refer here for more details.
-
If you are running as a native application, you do not need to use the section below to connect to Snowflake, as you’ll already have a connection.
-
Instead you’ll grant data access to your native application. Refer here for more details.
The below instructions are for connecting to Snowflake if you have installed Genesis using “pip install.” Connect to Snowflake Using a Username and Password
If you have a username and password for your Snowflake account, you can try connecting with those credentials. If you do not have a password, or can only log in via SSO or MFA (which is increasingly common), instead see the section below called “Configure JWT access to Snowflake.”
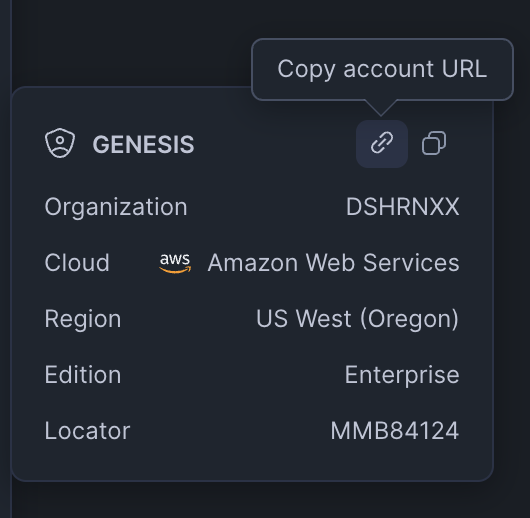
You will need to know your account URL and account locator. To get this, in the Snowflake GUI click on your initials in the bottom left corner, select “Account,” select your account, and press the “Copy Account URL” button, and make note of your account locator.
Ask Eve to connect to Snowflake using a username and password
Copy the prompt below to follow along
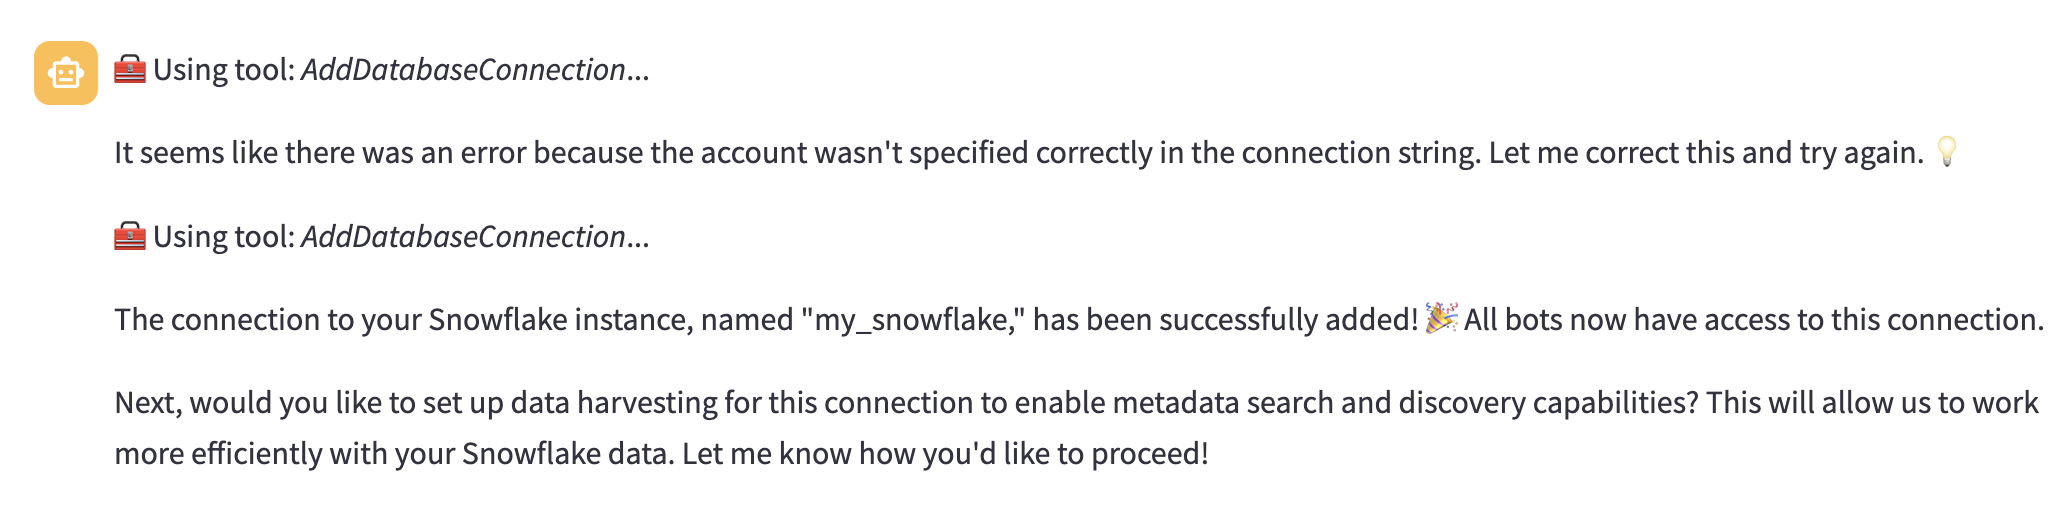
Eve, add a connection to Snowflake called my_snowflake, my account url is MY_SNOWFLAKE_URL, my account is MY_ACCOUNT_ID, my user is MY_USER_NAME, and my password is MY_PASSWORD. Allow all bots to have access.
Eve, add a connection to Snowflake called my_snowflake, my account url is https://eqb52188.snowflakecomputing.com, my account is sqb52188, my user is test_user, and my password is test_password. Allow all bots to have access.
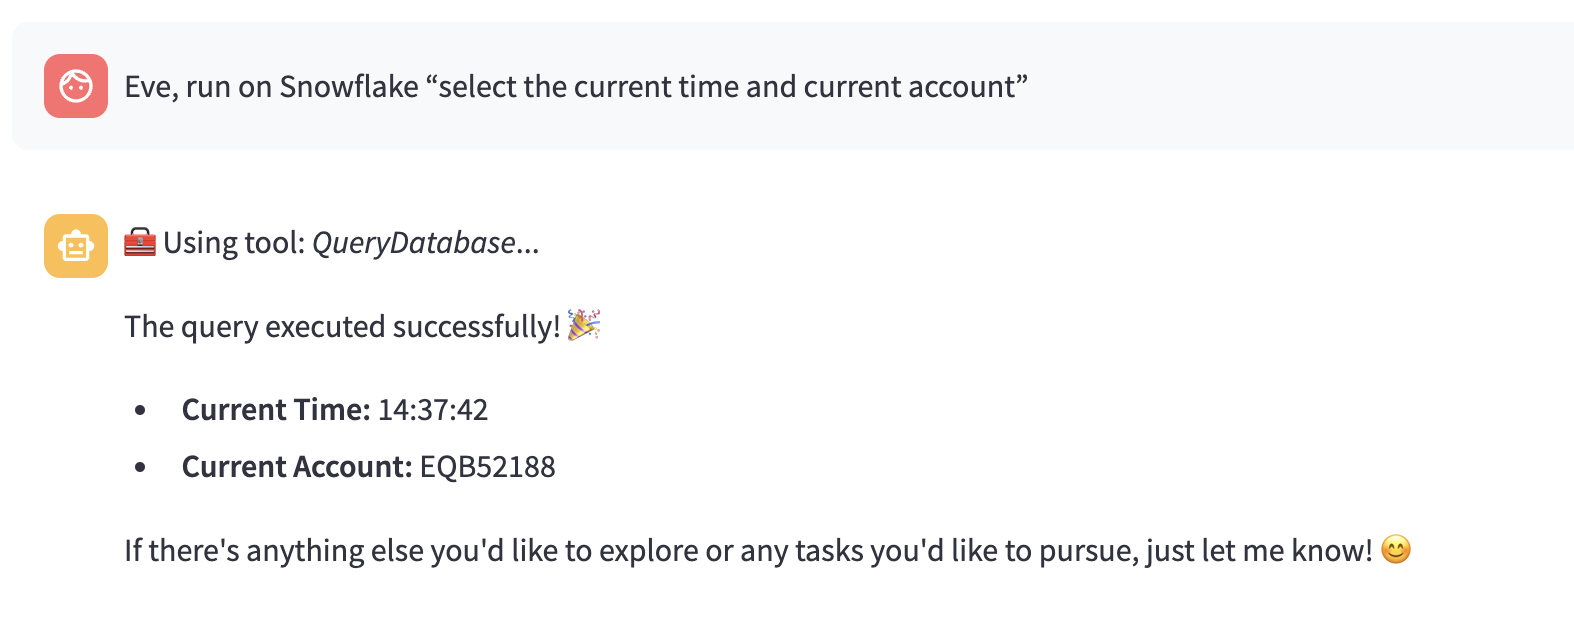
Eve, run on Snowflake, select the current time and current account"
NOTE: Some Snowflake accounts do not allow simply connecting with a username and password, the current best practice is to use the private key approach. You can skip this step if you have connected with a username and password.Otherwise, follow these steps to set up a private key-based connection.
Setup Key Pair Authentication
Run the following on your local system to create the private key. You can update the location of the key based on preference.openssl genrsa 2048 | openssl pkcs8 -topk8 -v2 des3 -inform PEM -out ~/Documents/keys/rsa_key.p8 -nocrypt
Create The Public Key
Run the following to create the public key. If the private key was encrypted, enter the same passphrase used.openssl rsa -in ~/Documents/keys/rsa_key.p8 -pubout -out ~/Documents/keys/rsa_key.pub
Store The Public Key With The User
In a Snowflake worksheet, alter the user to which the key will be applied to store the public key with the user.
-
Run this on both the accounts listed above (logged in as yourself, using SSO)
-
Replace <username> with your Snowflake username
-
Rsa_public_key is the content of the public key file (rsa_key.pub) generated in the previous step
USE ROLE ACCOUNTADMIN;
alter user <username> set rsa_public_key = 'exampleKey0RealKeyismuchLONGERandmulTIPLElines';
Testing The Public Key
In order to test that the public key was assigned correctly to the Snowflake user, run the following in Snowflake:DESC USER <username>;
SELECT TRIM((SELECT "value" FROM TABLE(RESULT_SCAN(LAST_QUERY_ID()))
WHERE "property" = 'RSA_PUBLIC_KEY_FP'), 'SHA256:');
openssl rsa -pubin -in ~/Documents/keys/rsa_key.pub -outform DER | openssl dgst -sha256 -binary | openssl enc -base64
[Optional] Testing Your Connection
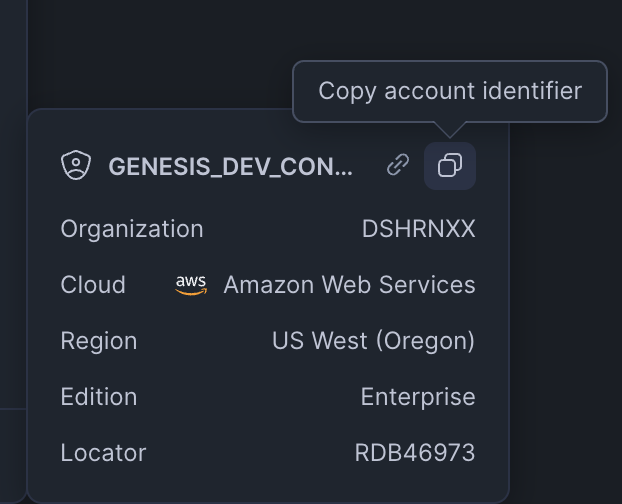
Get Your Account Identifier
In Snowflake’s GUI, hover over your initials in the bottom right corner of the screen, select your account, and copy the account identifier.
It will look like
DSHRNXX.GENESIS_DEV_CONSUMER
DSHRNXX.GENESIS_DEV_CONSUMER -> dshrnx-genesis-dev-consumer
Add a JWT-based Connection to Snowflake to Genesis
Tell Eve you want to connect to Snowflake and provide your account identifier (as determined above), username, and path to your private key file
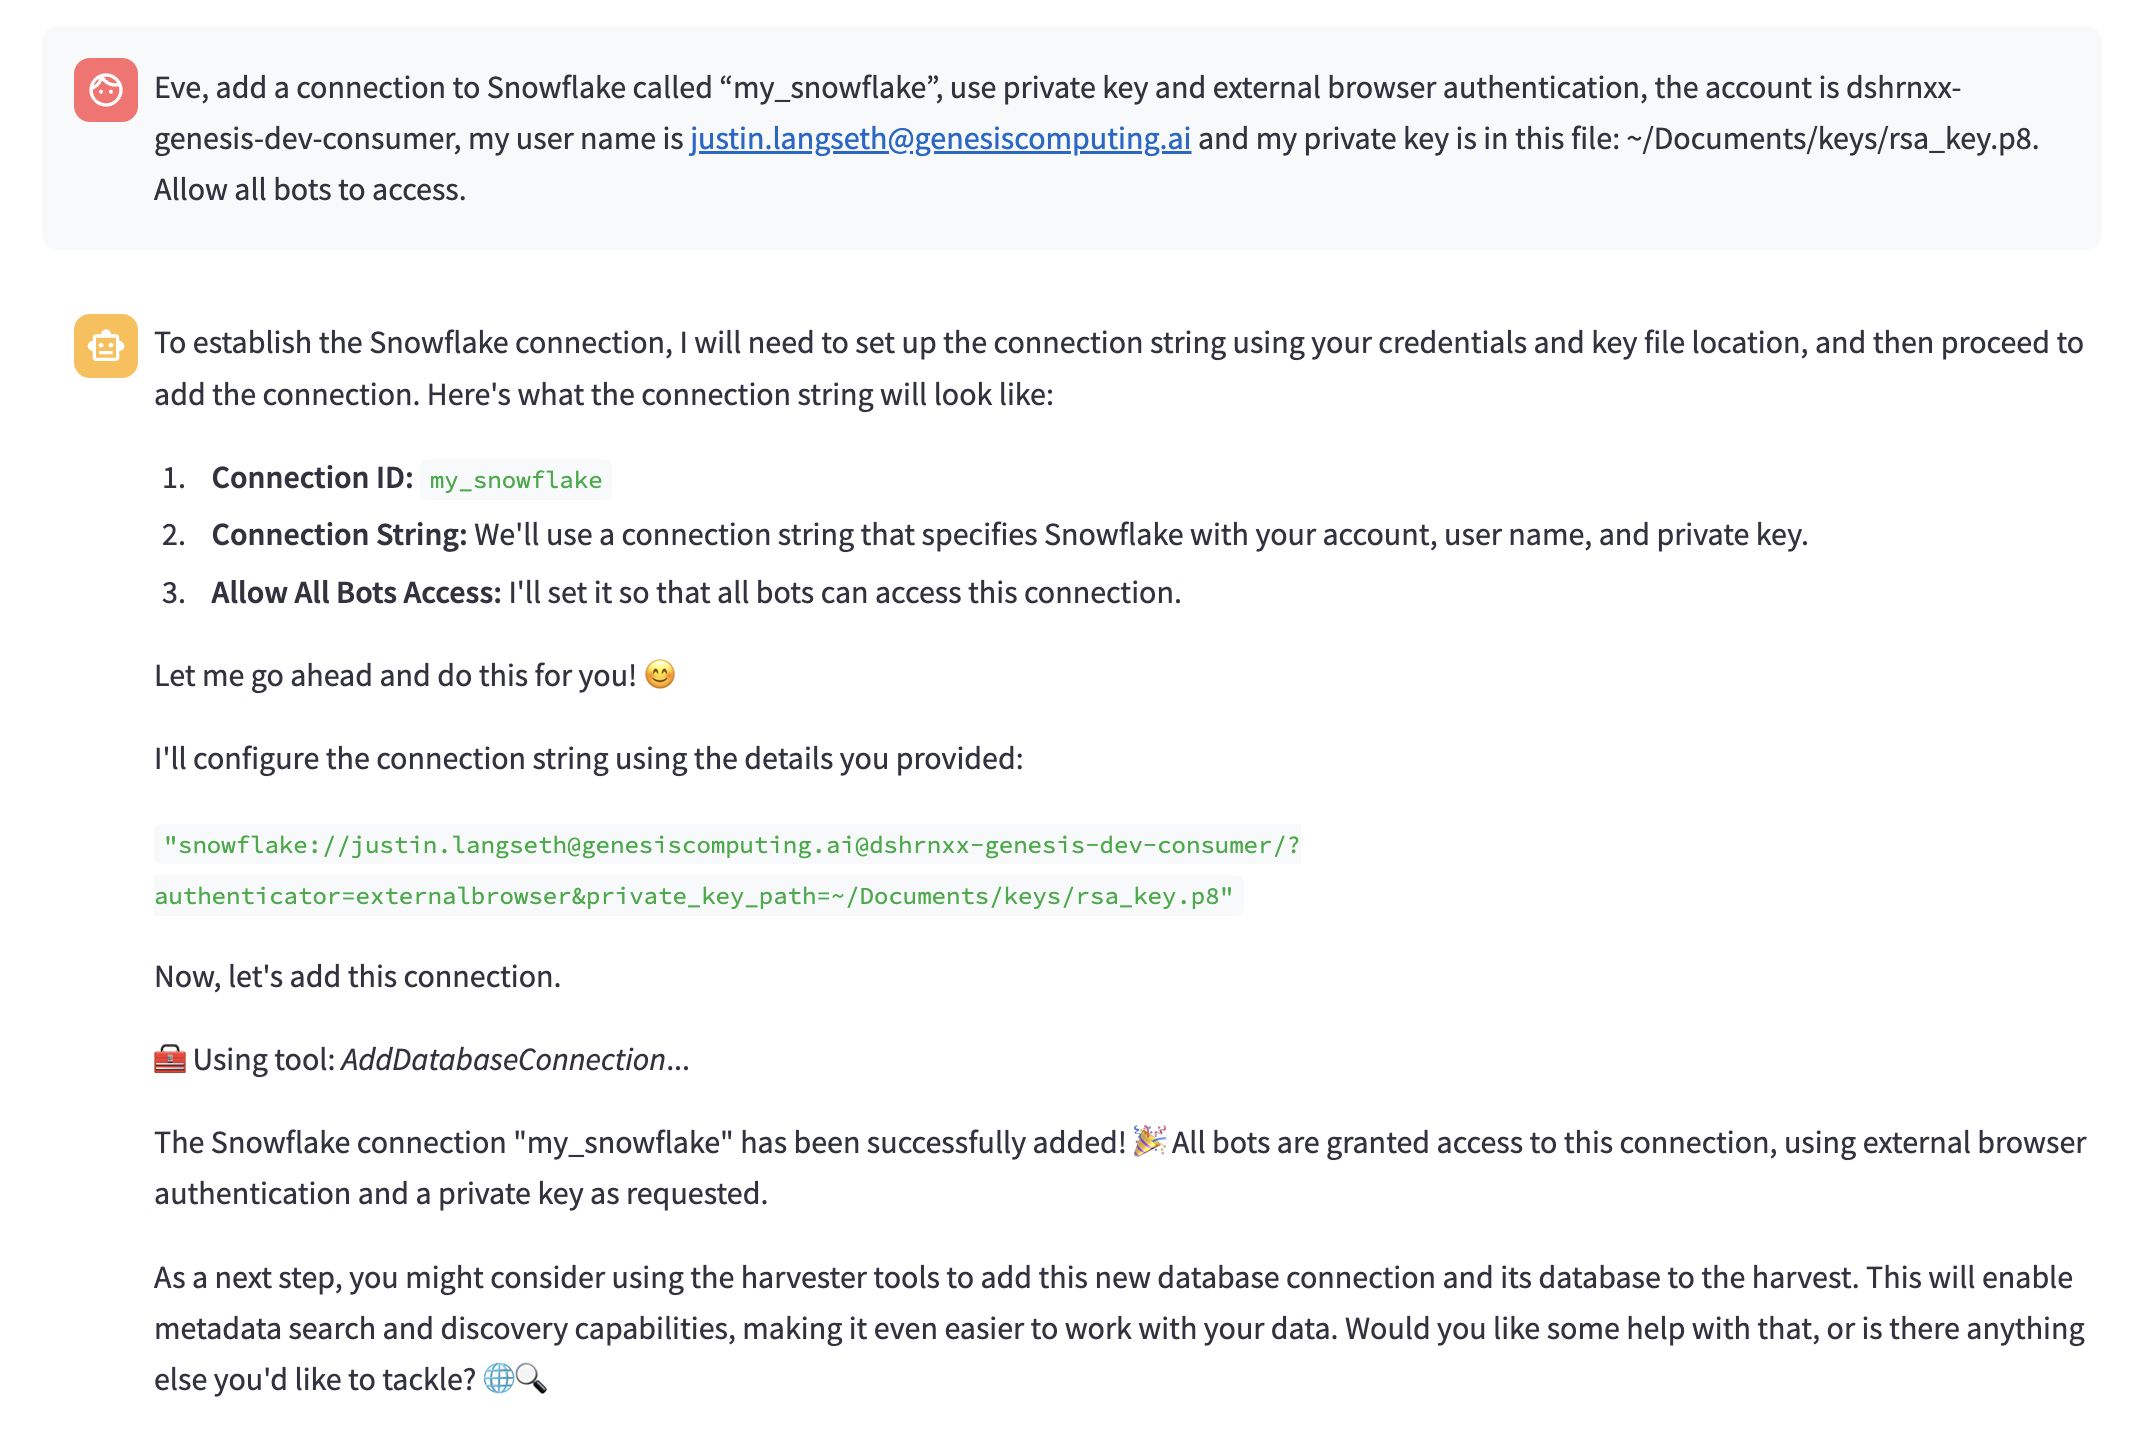
Eve, add a connection to Snowflake called “my_snowflake”, use private key and external browser authentication, the account is <your account identifier>, my user name is <your snowflake user id or your sso email address> and my private key is in this file: <path to your private key file>. Allow all bots to access.
Eve, add a connection to Snowflake called “my_snowflake”, use private key and external browser authentication, the account is dshrnxx-genesis-dev-consumer, my user name is [email protected] and my private key is in this file: ~/Documents/keys/rsa_key.p8. Allow all bots to access.
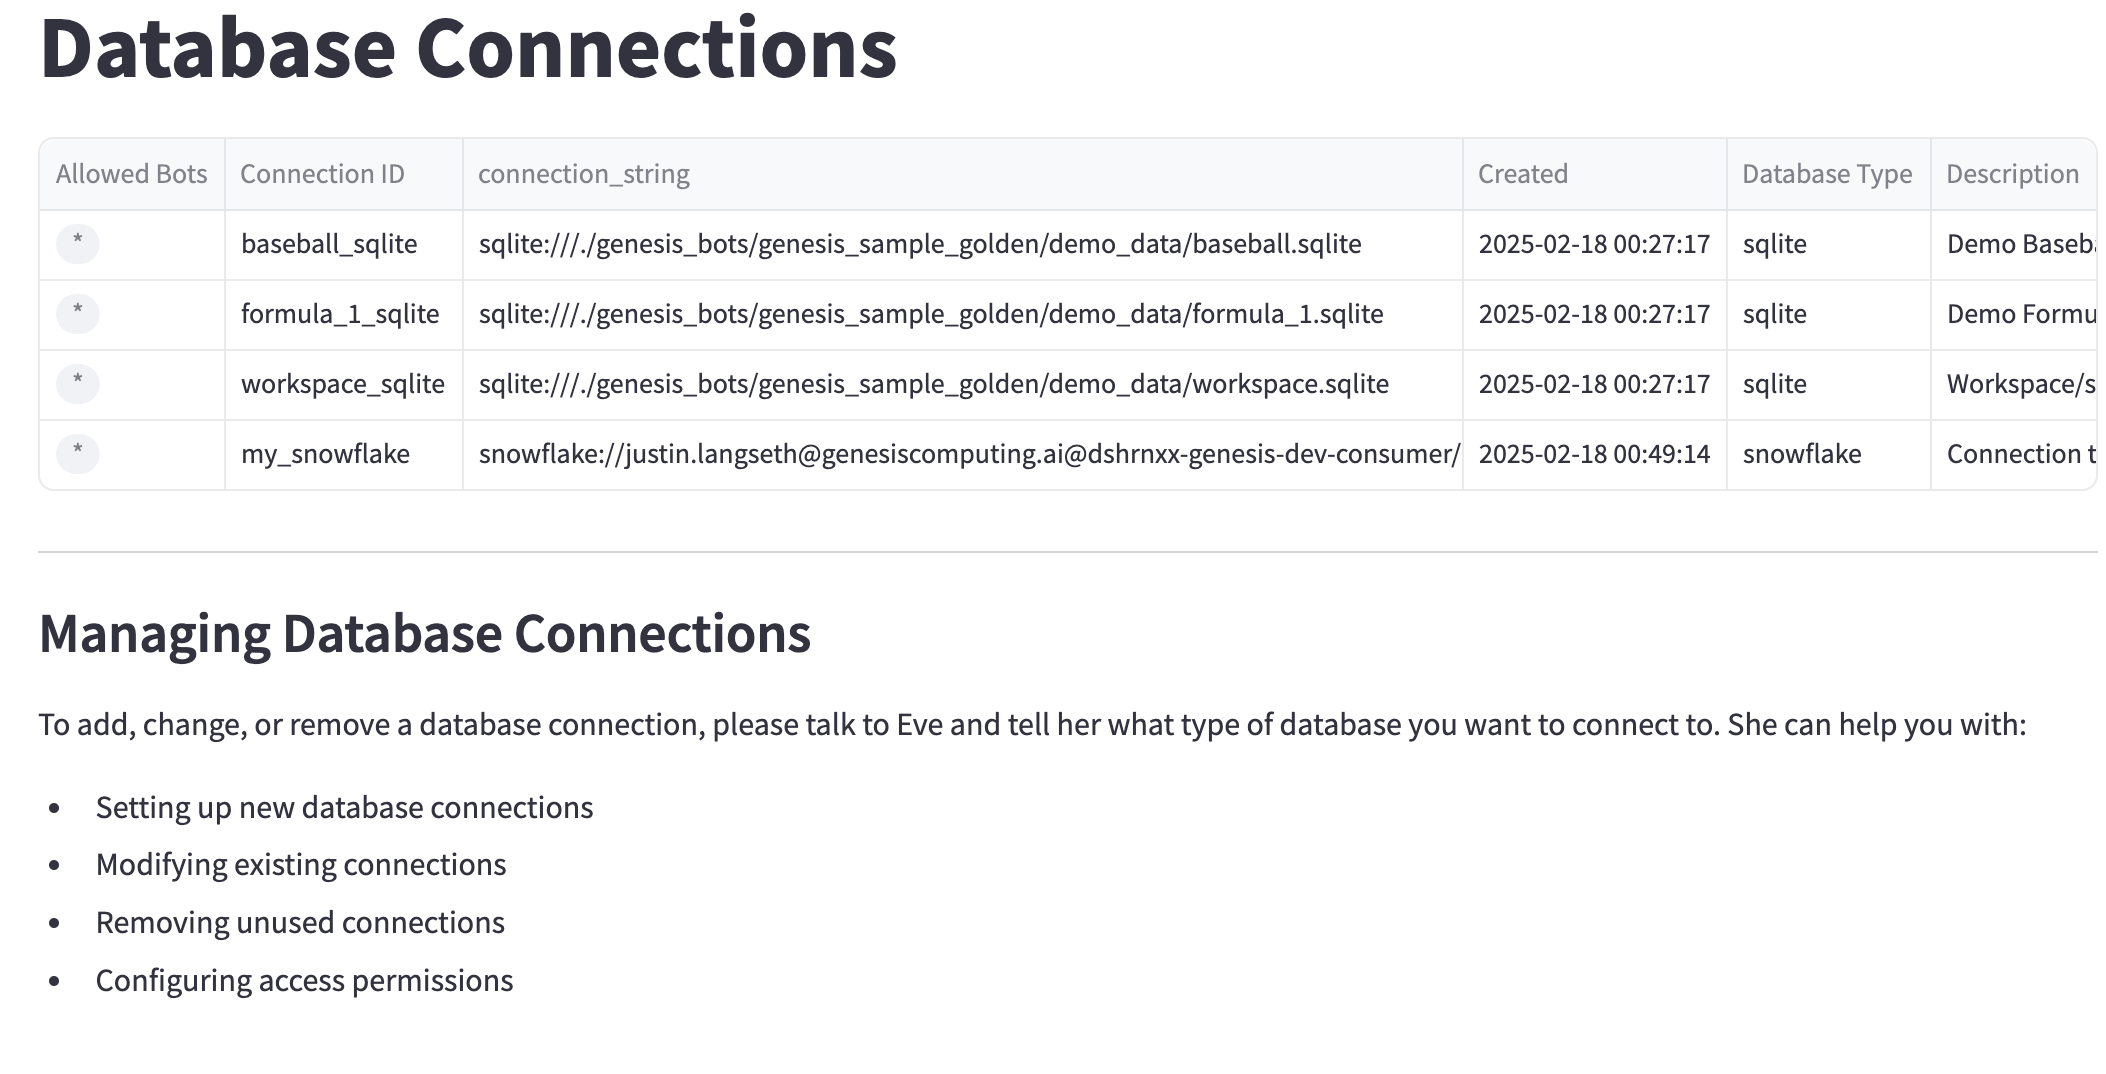
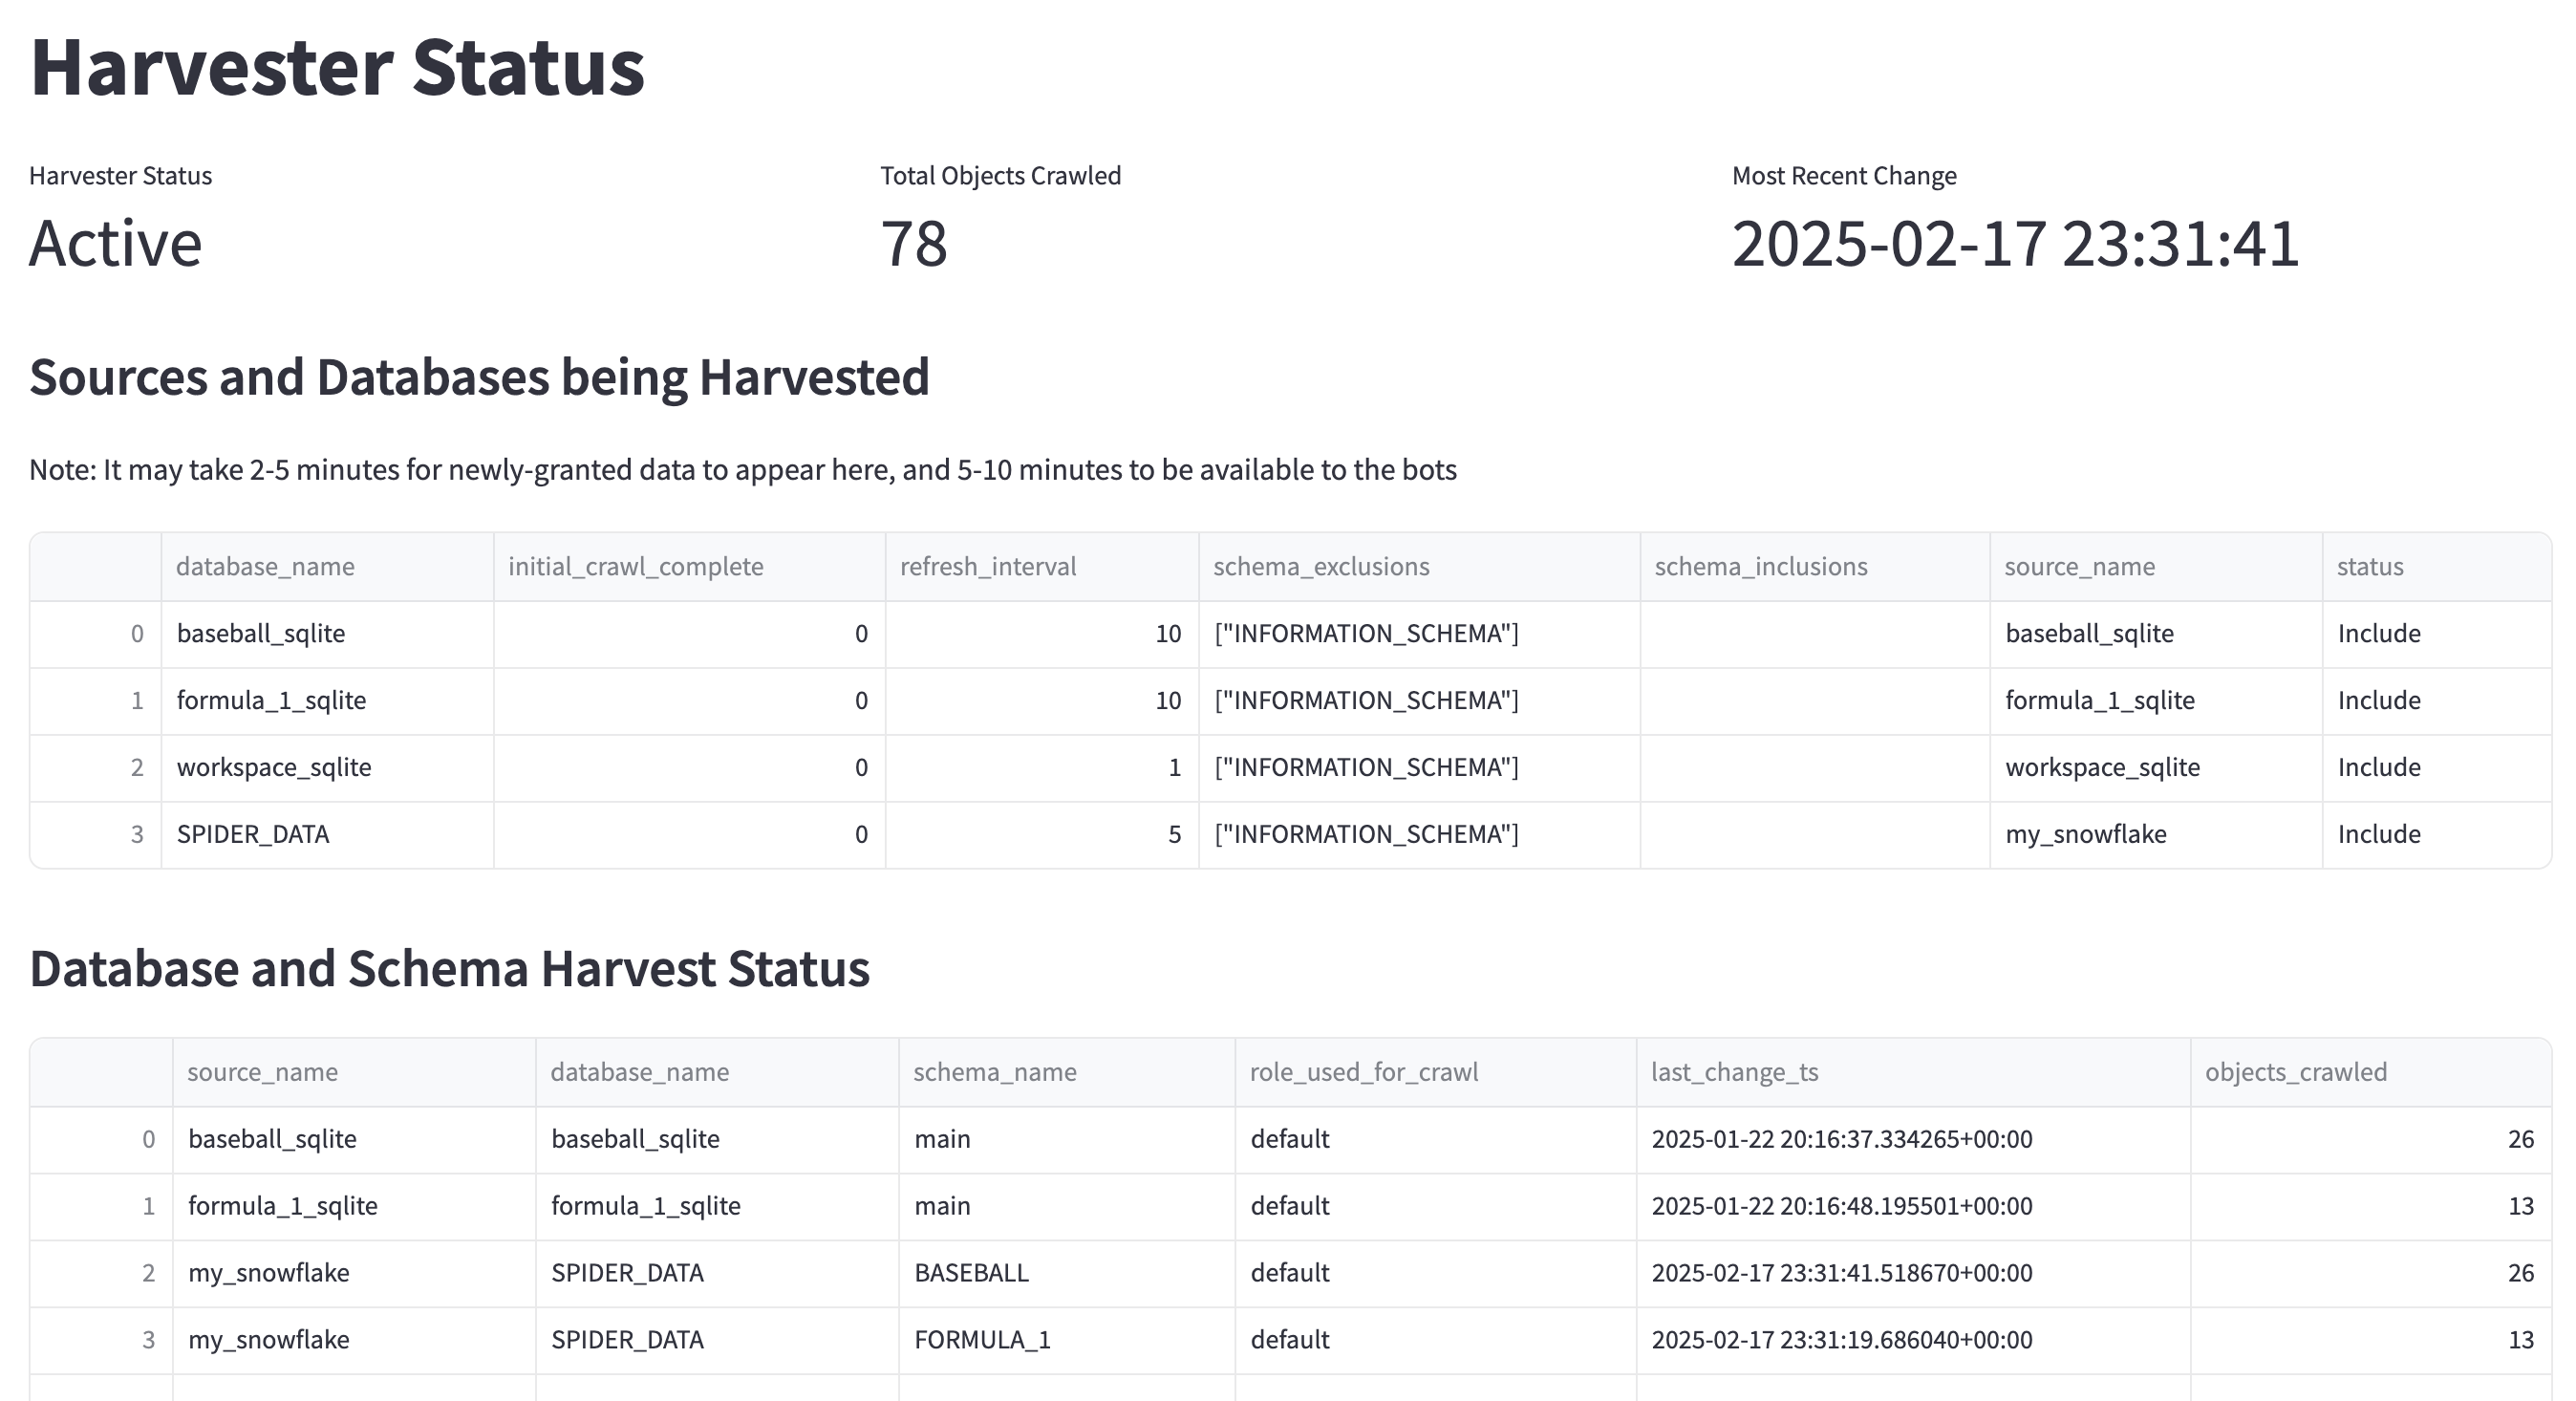
Adding Snowflake Databases to the Harvest
You can add any databases you’d like to the harvest.
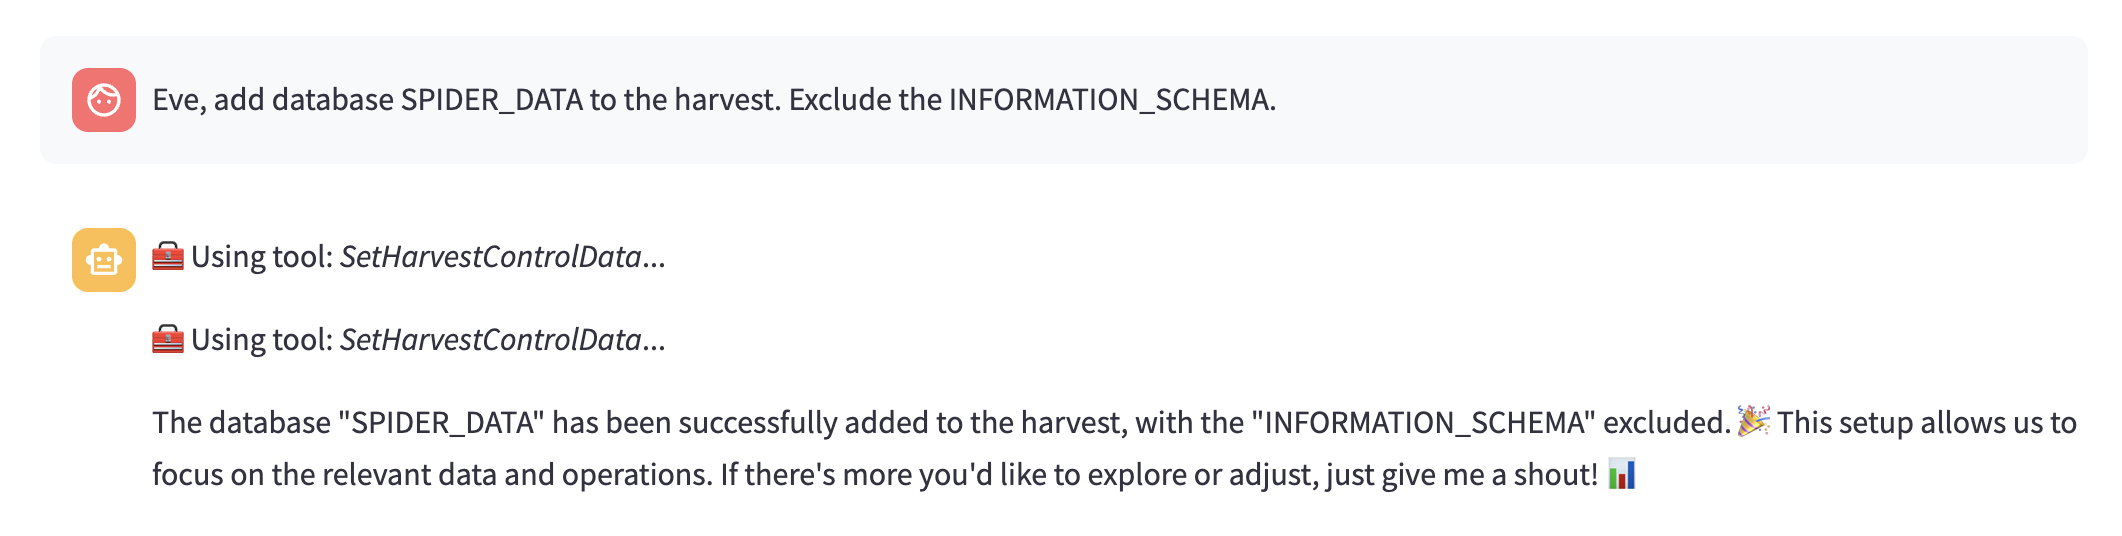
NOTE: Generally, you’ll want to exclude the INFORMATION_SCHEMA from the harvest unless you’re specifically looking to analyze detailed schema and usage information.
Eve, add database SPIDER_DATA to the harvestm Exclude the INFORMATION_SCHEMA
Chat with Genesis Bots via Genesis API
Once connectivity to the Snowflake account has been established, run the following command to begin chatting with Genesis Bots from the command line.
Format:
python -m apps.demos.cli_chat --server_url "snowflake://<LOGIN>@<ORGANIZATION_ID>-<ACCOUNT_LOCATOR>" --snowflake_conn_args "authenticator=SNOWFLAKE_JWT,role=<ROLE_NAME>,private_key_file=<PATH_TO_PRIVATE_KEY>/rsa_key.p8"
NOTE: Replace username, org-account, role, and private_key_file params as applicable.
python -m apps.demos.cli_chat --server_url "snowflake://[email protected]@DSHRNXX-CVB46967" --snowflake_conn_args "authenticator=SNOWFLAKE_JWT,role=accountadmin,private_key_file=/Users/mrainey/Documents/keys/rsa_key.p8"
Welcome to the Genesis chat interface. Type '/quit' to exit.
Start your first message with @<bot_id> to chat with that bot. Use it again to switch bots.
---------------------------------------------------------------------------------------------------------------------------------------------------------
[You]: @Eve hi
[Eve]:  Hello! 😊 How can I assist you today?
[You->Eve]: /quit
Exiting chat. Goodbye!