> ## Documentation Index
> Fetch the complete documentation index at: https://docs.genesiscomputing.com/llms.txt
> Use this file to discover all available pages before exploring further.
# Genesis Bots Mac / Linux Installation Guide
> This installation guide will help you get Genesis Bots installed and configured on Mac and Linux systems.
# Installing Genesis Bots on Mac / Linux
The following steps will guide you through the process of setting up the genesis-bots server, UI Applicaiton (Streamlit), and API examples locally on your machine.
**Note: Python Version**
Genesis requires `Python 3.10 and above`. Use this command to check your version.
```bash theme={null}
python3 --version
```
If needed, force the python version in your virtual env to supported version 3.10+ (depending on your python installation manager). In the step below, we will assume the command python3 points to a version 3.12.x.
**Make a new folder and venv**
**Note:** in the steps below we are creating a working directory named `genesis`. This directory will be used for setting up the sample data, managing server state, installing sample scripts and for managing your virtual env.
```
mkdir genesis
cd genesis
python3 -m venv .venv_gbots
source .venv_gbots/bin/activate
```
**Install Genesis Bots**
```
pip install genesis-bots
```
**Check your installation**
You should now be able to invoke the Gensis CLI command `genesis`:
```
genesis --help
```
The output should look like this:
```
Usage: genesis [OPTIONS] COMMAND [ARGS]...
CLI for managing genesis_bots services.
Options:
--help Show this message and exit.
Commands:
cleanup Cleanup the setup example files and sample data in the working...
setup Setup example files and sample data in a working directory.
start Start the genesis_bots services locally (as a blocking process).
```
Run the following command to copy sample data and sample scripts to your working diretory. This is required before the first time you run the Genesis Server in your working directory.
```
genesis setup
```
This command will create a `genesis_sample` directory in your working directory.
```
$ ls -1 genesis_sample
database_demos
demo_data
demos
```
Under this directory you will find the following:
* `database_demos` - contains examples and instructions on how to connect your Genesis server to various databases that are supported by Genesis (other than Snowflake, which we cover seperately).
* `demo_data` - contains local database defintions (e.g. Baseball data, Formula1 data) and other sample datasets that are used for demonstrating the data tools used by the Genesis Bots on your local machine.
* `demos` - contains python example scripts that demonstrate how to use the Genesis API (the `genesis_bots.api` python package) to build AI data applications using the Genesis system.
**Run Genesis Bots**
Before you start Genesis, **make sure that port 8501 and 8080 are not being used** by another process.
In a dedicated terminal window, run the Genesis Server using the following command:
```
genesis start
```
This will start both the core Genesis server process and metadata harvester process, and launch the Streamlit user interface in a browser window.
In the Genesis Streamlit browser window, add your [**OpenAI API key**](https://platform.openai.com/api-keys) to the application and click Submit Model Selection.
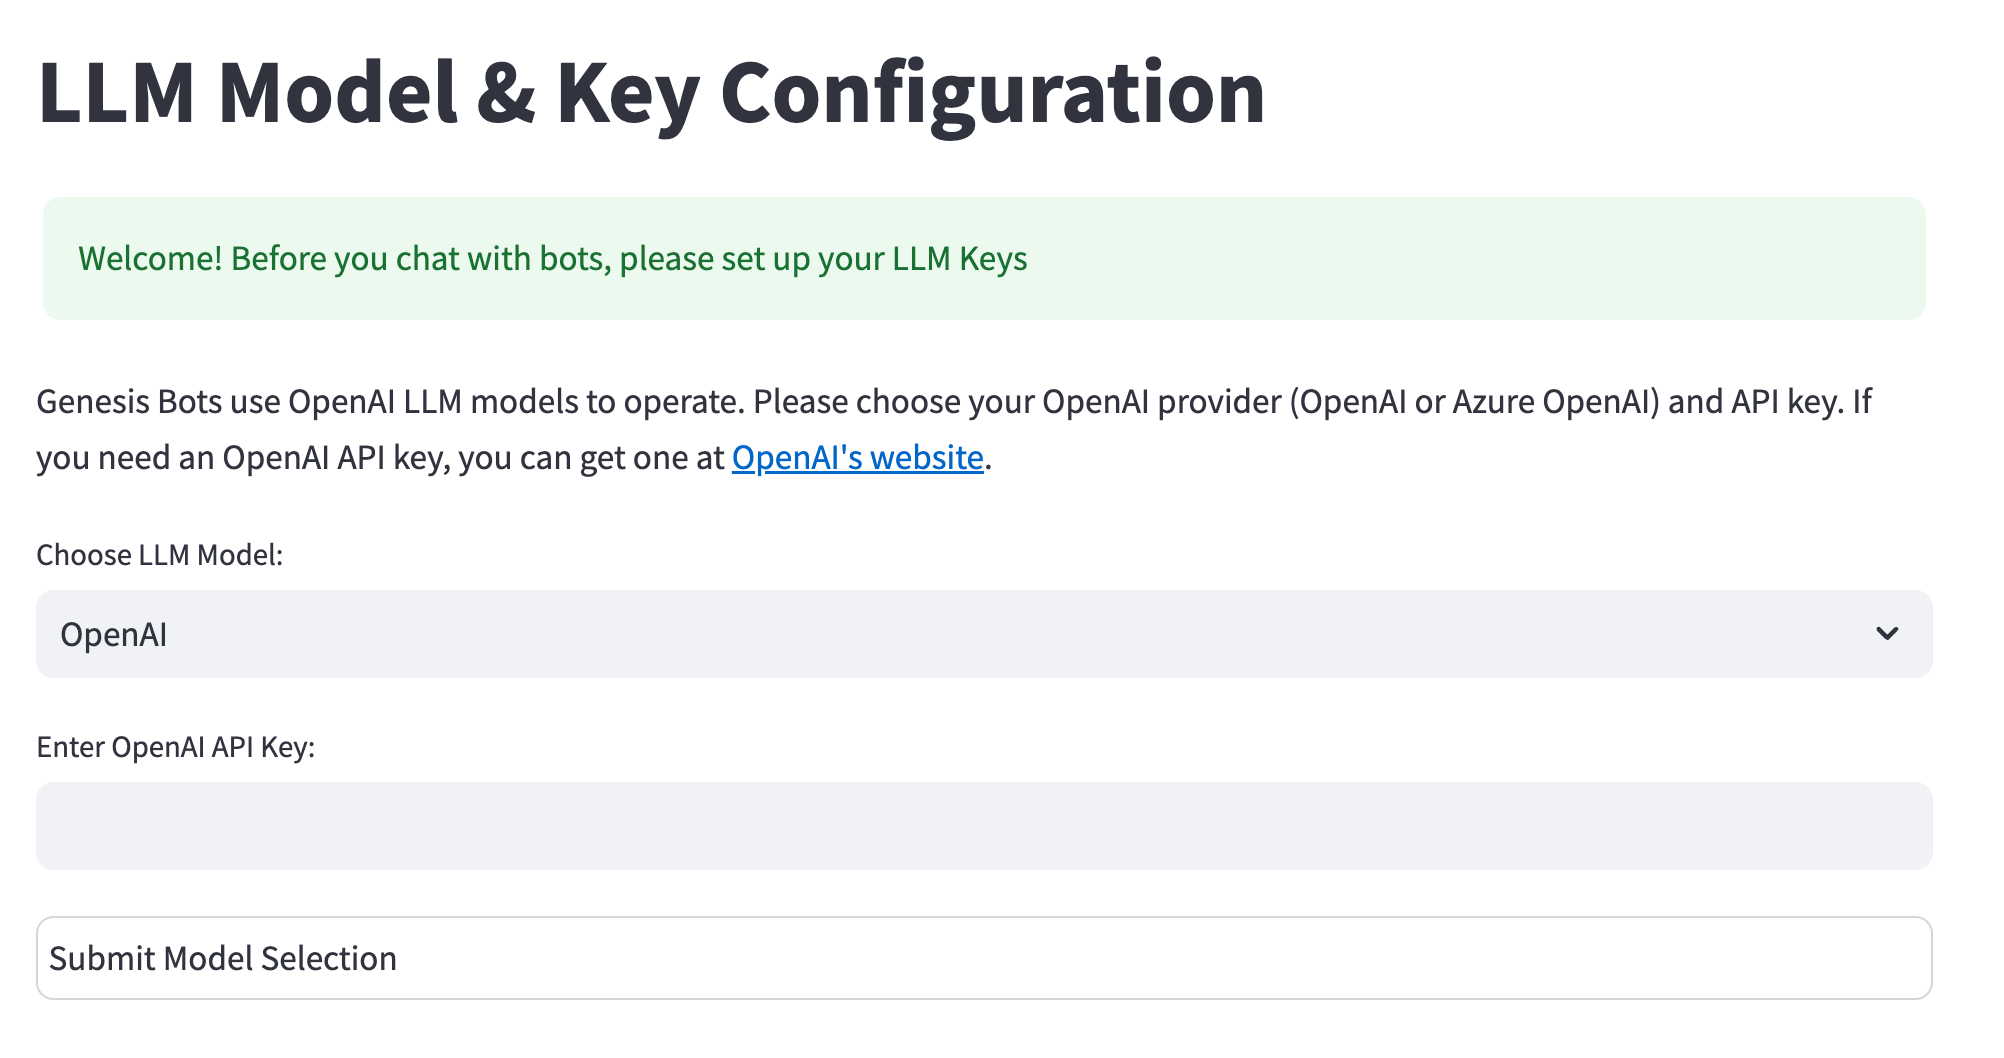 Refresh the browser window and you're ready to chat with Eve!
Next, we'll be going over connecting Genesis to your data securely.
**Start by selecting your data source below**
### Connect to Snowflake
### Connect to SQLite
### Connect to MySQL
### Connect to PostgreSQL
### Connect to Redshift
### Connect to BigQuery
Refresh the browser window and you're ready to chat with Eve!
Next, we'll be going over connecting Genesis to your data securely.
**Start by selecting your data source below**
### Connect to Snowflake
### Connect to SQLite
### Connect to MySQL
### Connect to PostgreSQL
### Connect to Redshift
### Connect to BigQuery